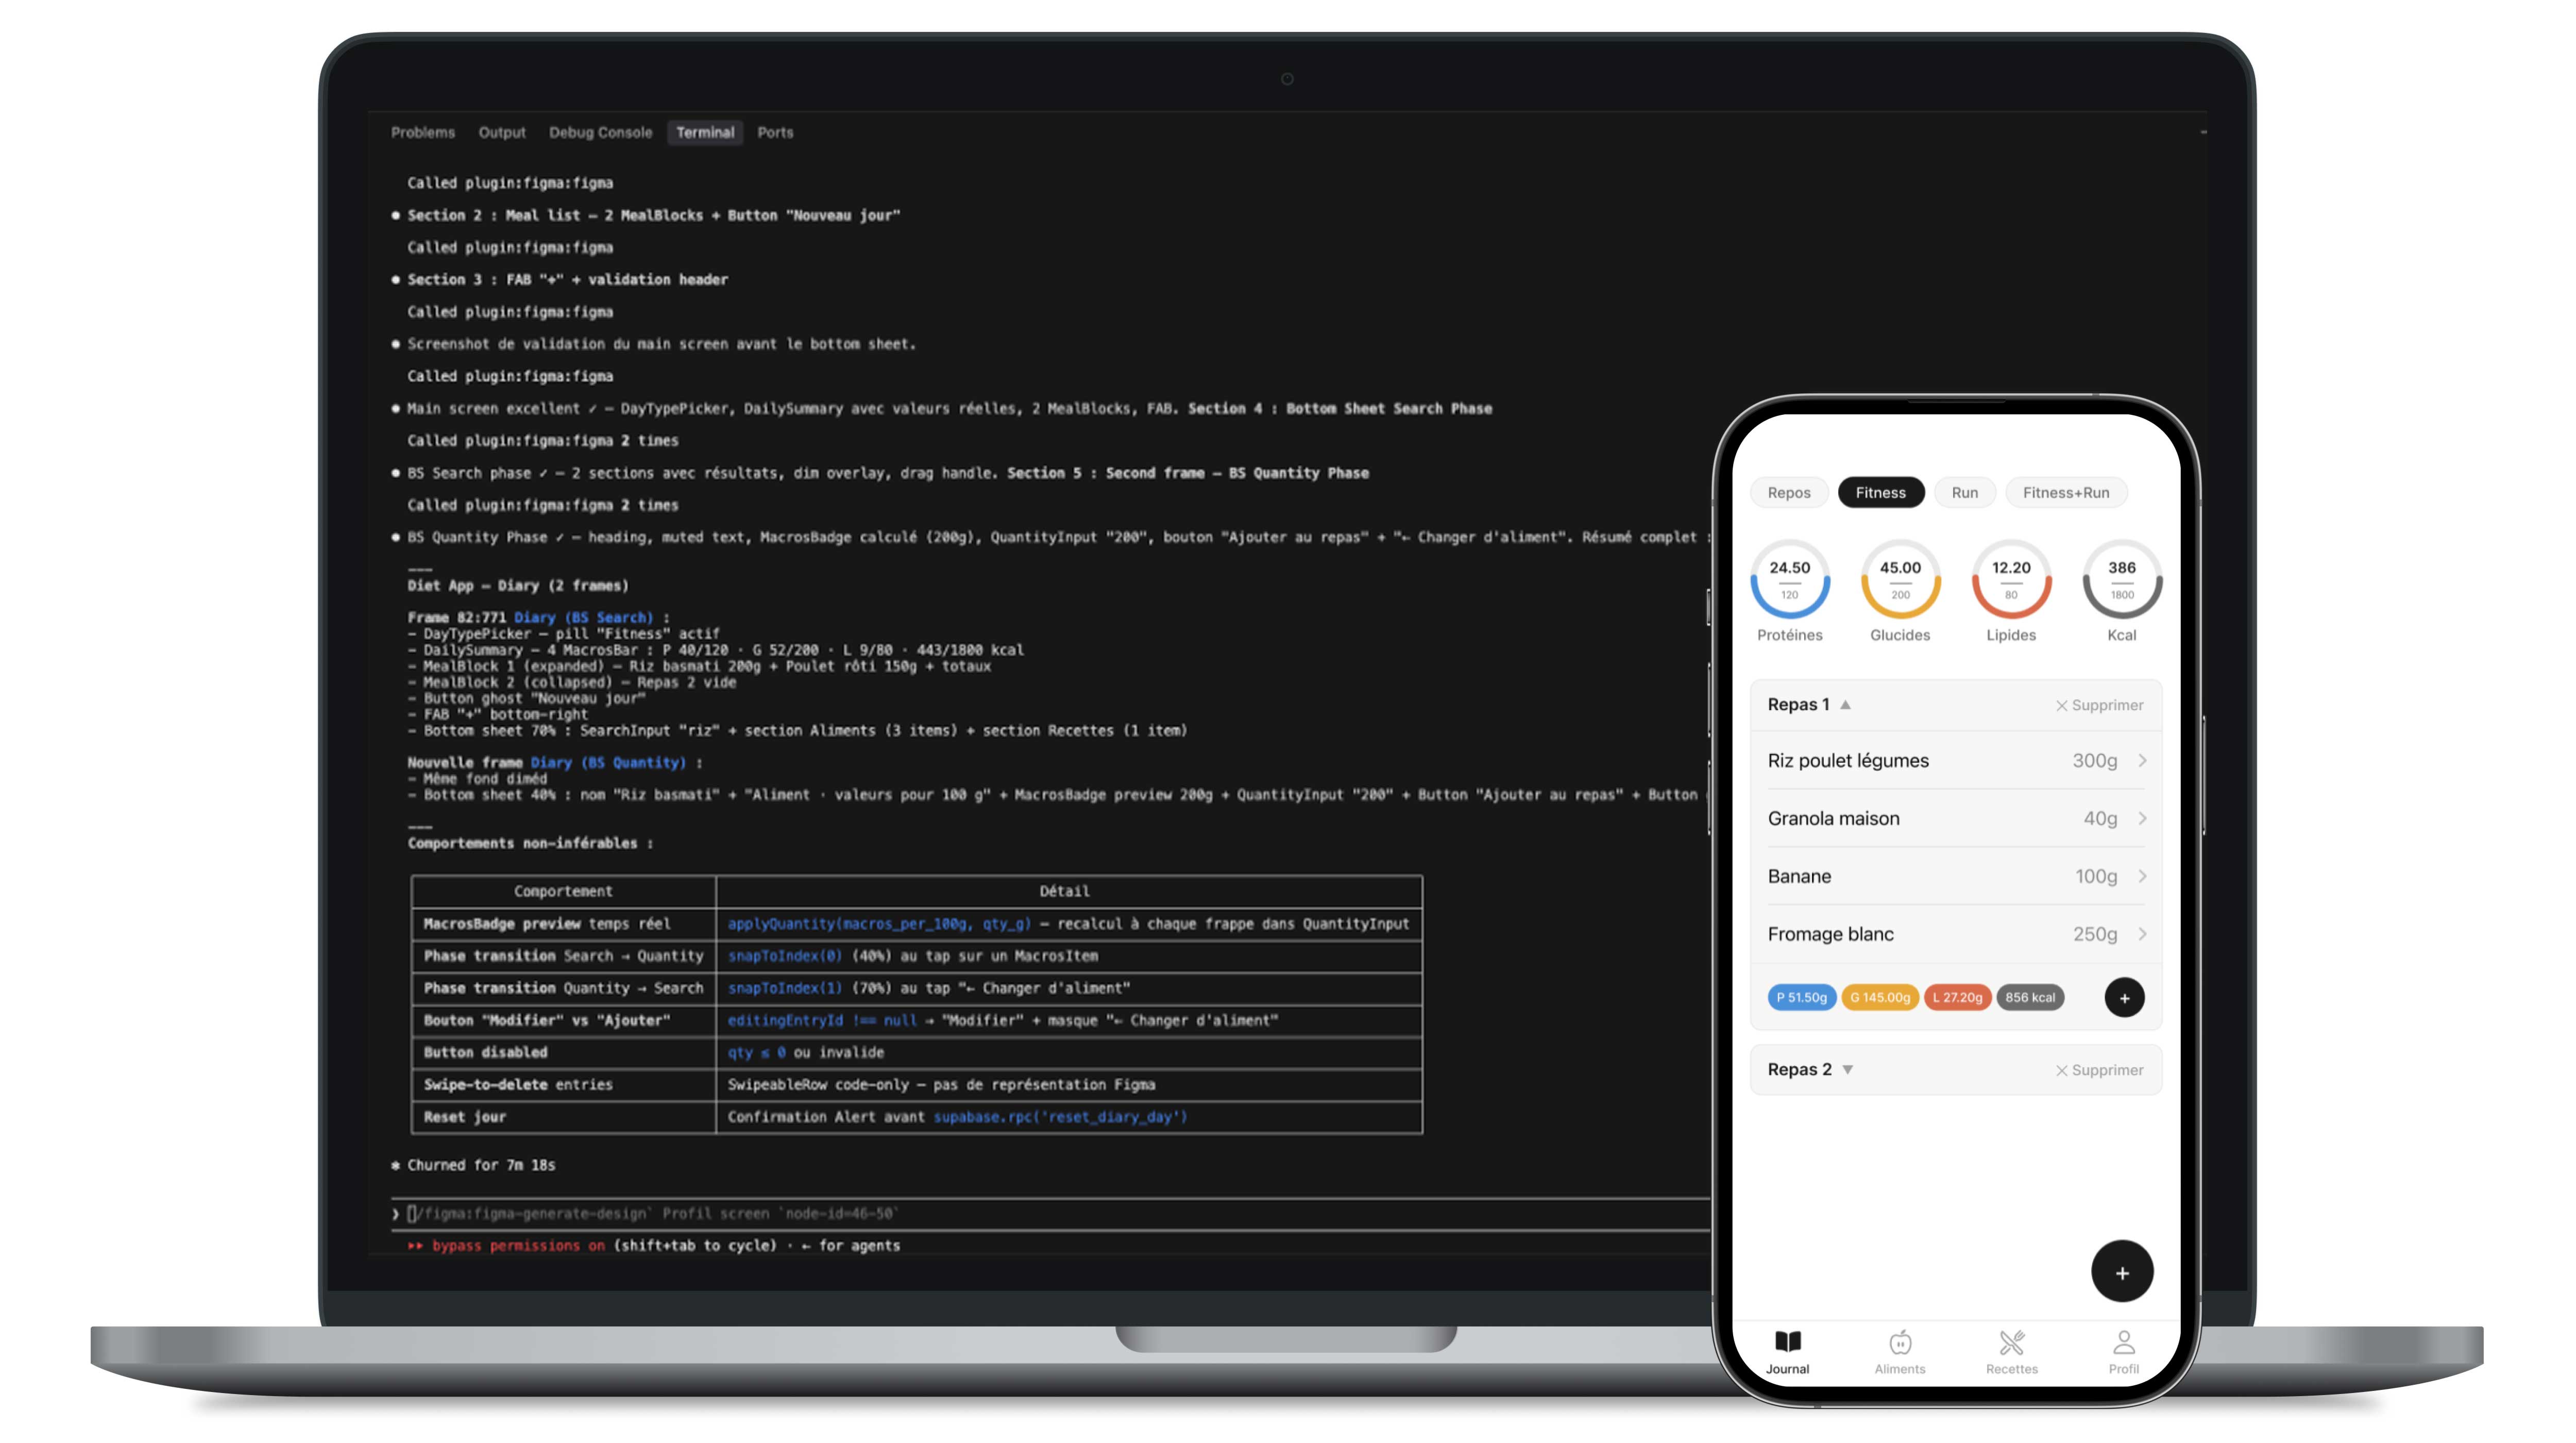
Building a mobile app on an unfamiliar stack. That was the starting hypothesis. React Native for mobile, Claude Code for AI-assisted development, Figma MCP to bridge designs and code. Three tools I had never used together, on a real production project.
This project documents that process end to end: how to structure your thinking with AI before touching any code, steer a build through sequenced batches, build a design system that lives simultaneously in the codebase and in Figma, and establish a two-way Code/Figma workflow via MCP. An app installed on my iPhone that I use every day.
Thinking.
Building a mobile app: leveling up on React Native and AI
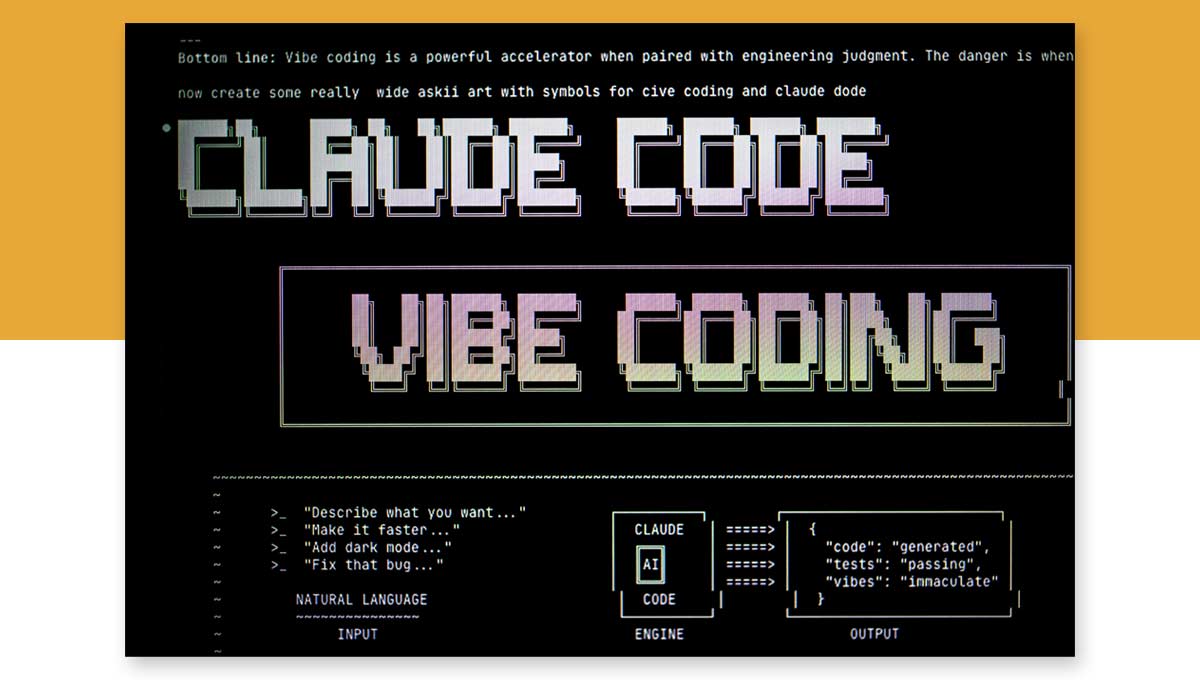
The starting point
A designer and web developer for 15 years, I've built my practice on a broad ecosystem: Adobe, Figma, HTML, CSS, JavaScript, then modern frameworks: Backbone, Angular, Vue, Nuxt. But mobile has always been part of my practice too. As early as 2014, with Play2MeetYou then Guidr, I built my first hybrid mobile apps on Cordova, in AngularJS and BackboneJS. Later, at Accor, I dove into designing a mobile design system at scale, working closely with iOS and Android guidelines.
React Native, on the other hand, I had never touched. The promise had interested me for a long time: writing JavaScript and React to produce real native interfaces, iOS and Android from a single codebase, without going through a WebView. That's where Cordova showed its limits at the time: the app ran inside the phone's embedded browser, wrapped in a native container. You stayed in the web, with its rendering and performance constraints. React Native works differently: each component translates directly into the platform's native component. View, Text, TextInput aren't styled HTML elements, they're their iOS and Android equivalents. It's this promise of native access from a JavaScript workflow that made me want to take the plunge.
The project
Since 2020, I've managed my nutrition through a Google Sheets file I've built and refined over the years. First for myself, then for my clients once I developed a side activity as a fitness and nutrition coach. A well-oiled, automated file that knows exactly what I need, but that remains a file.
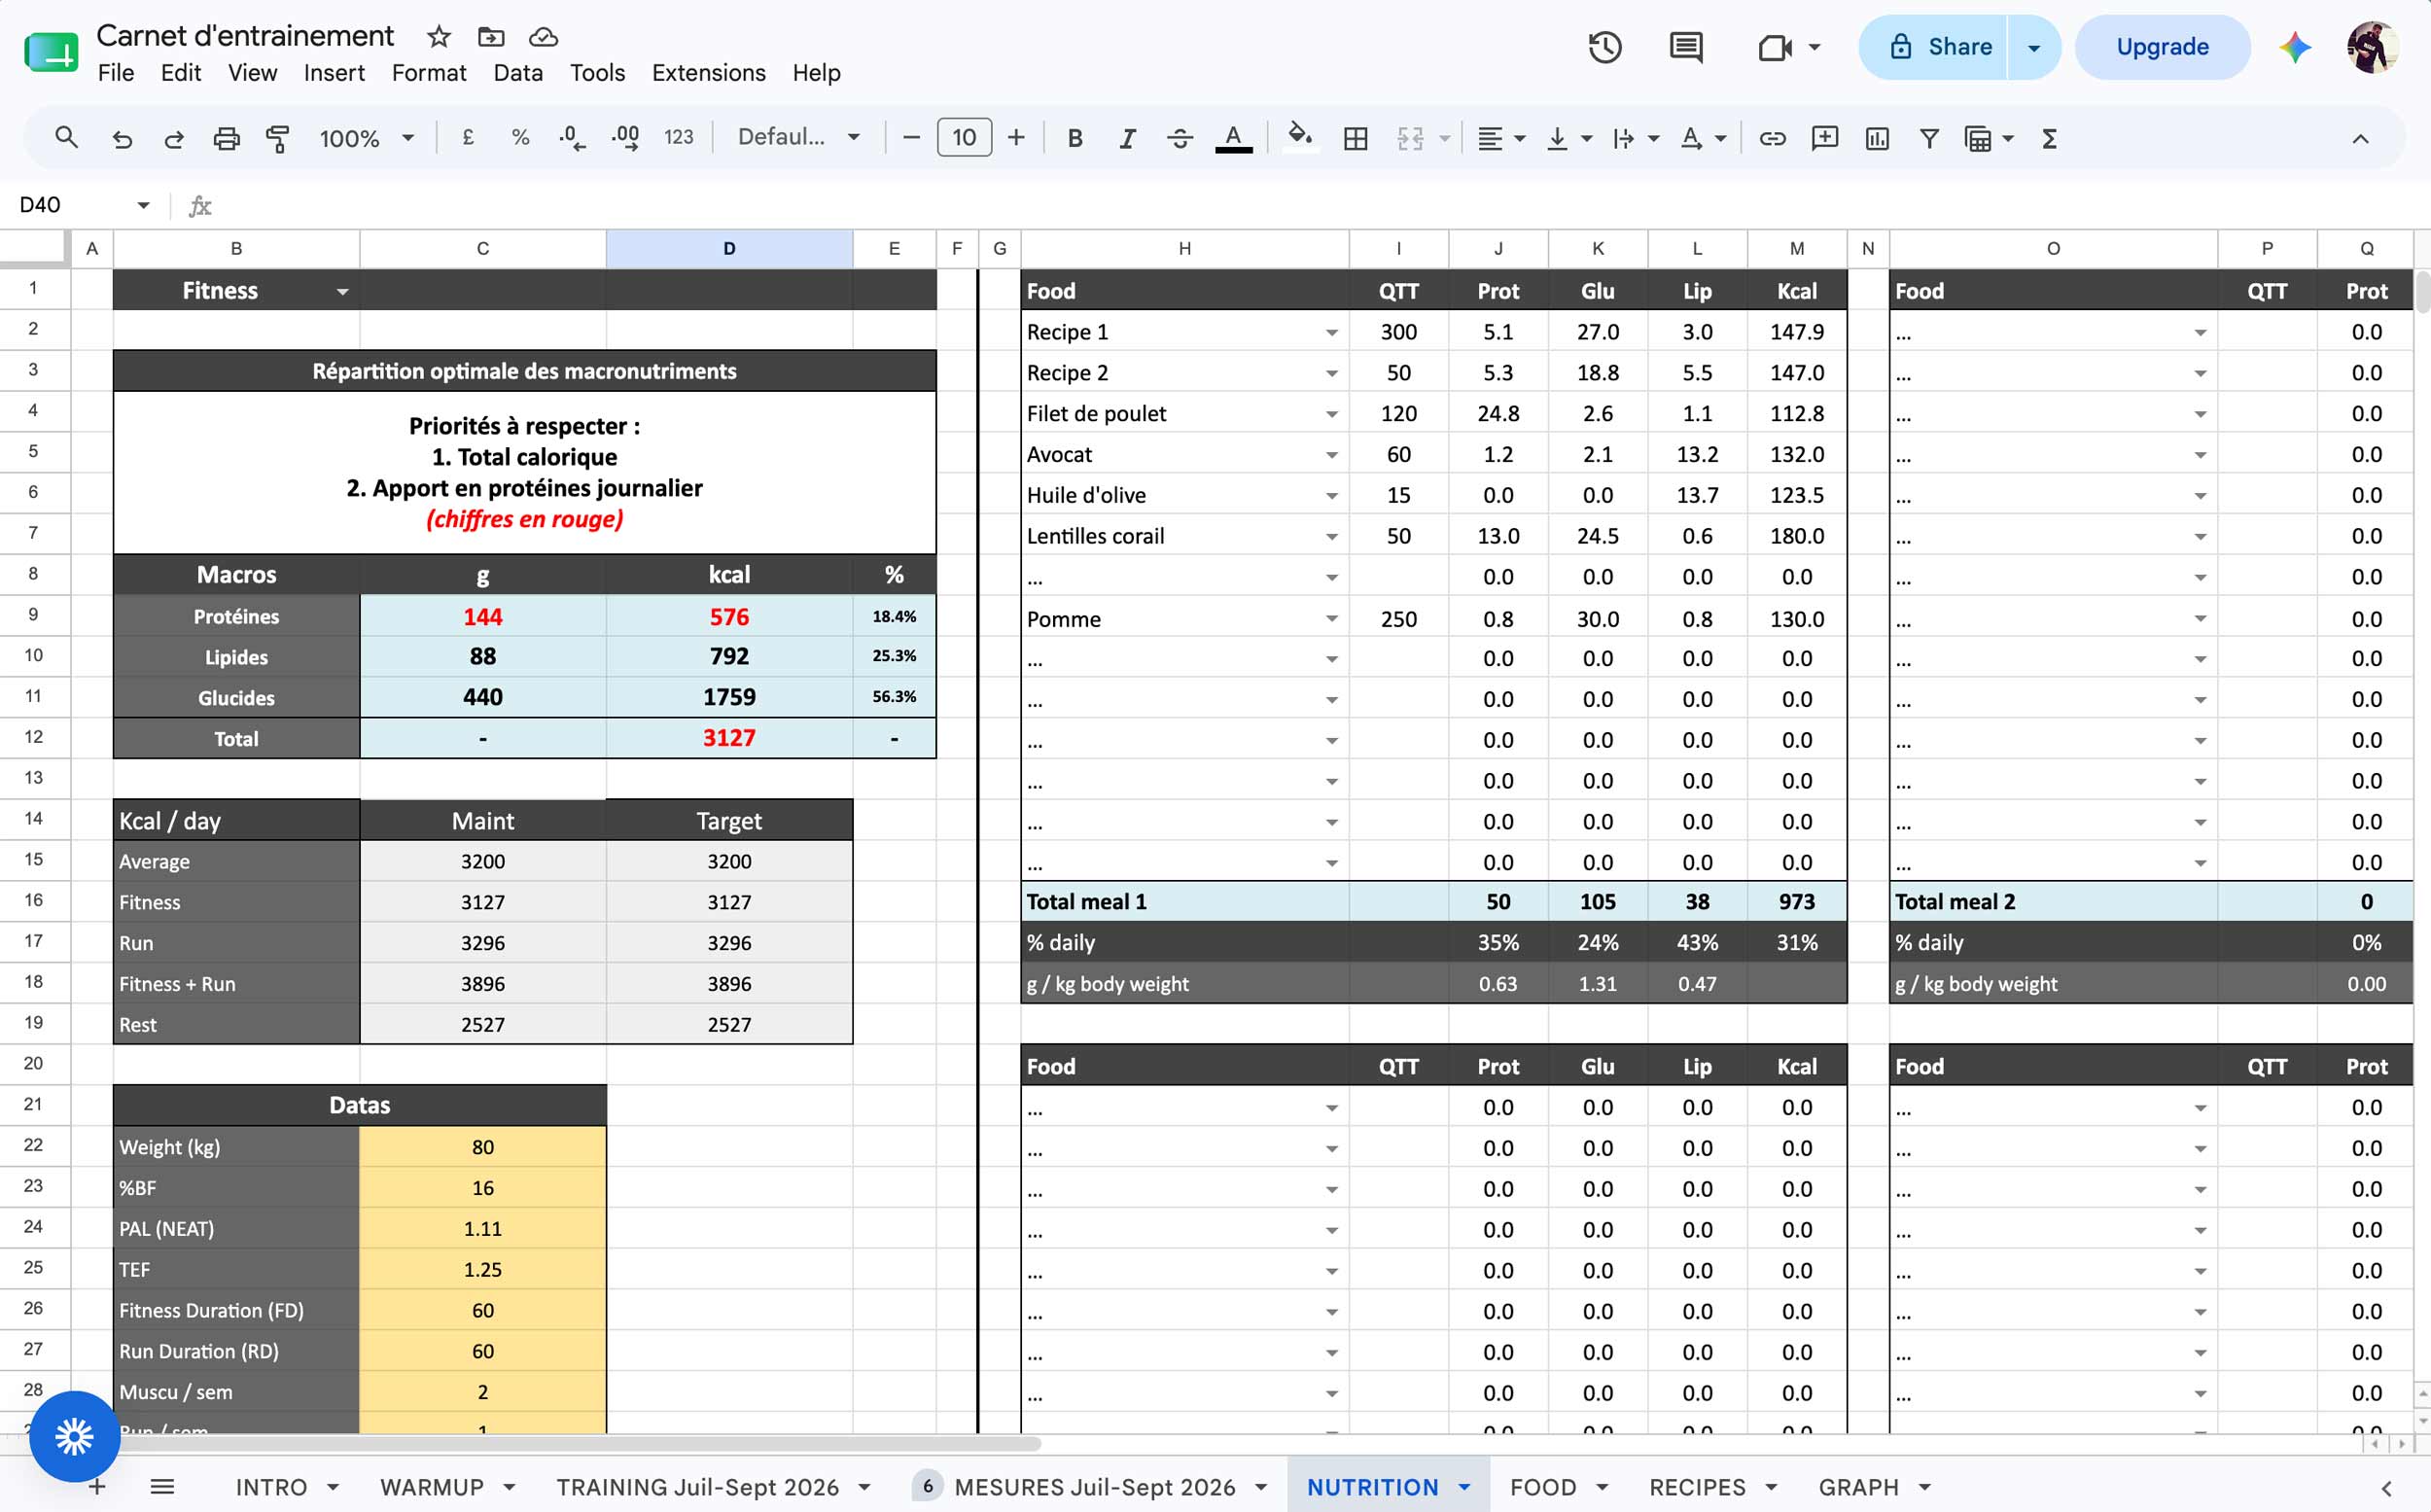
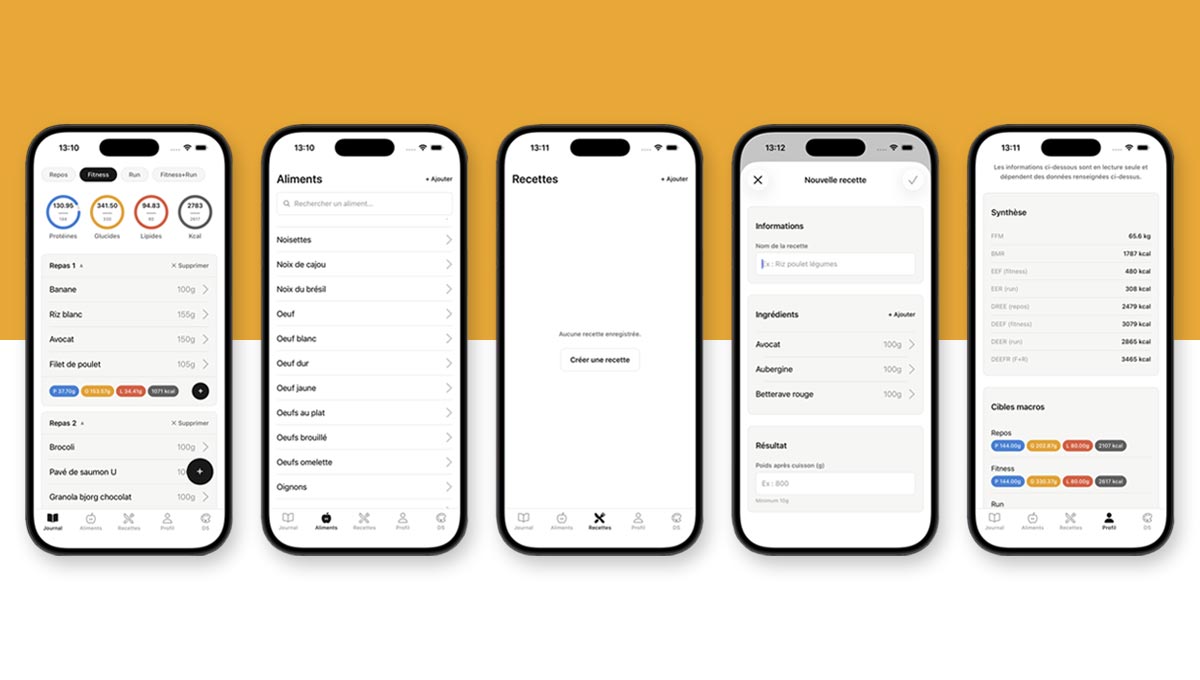
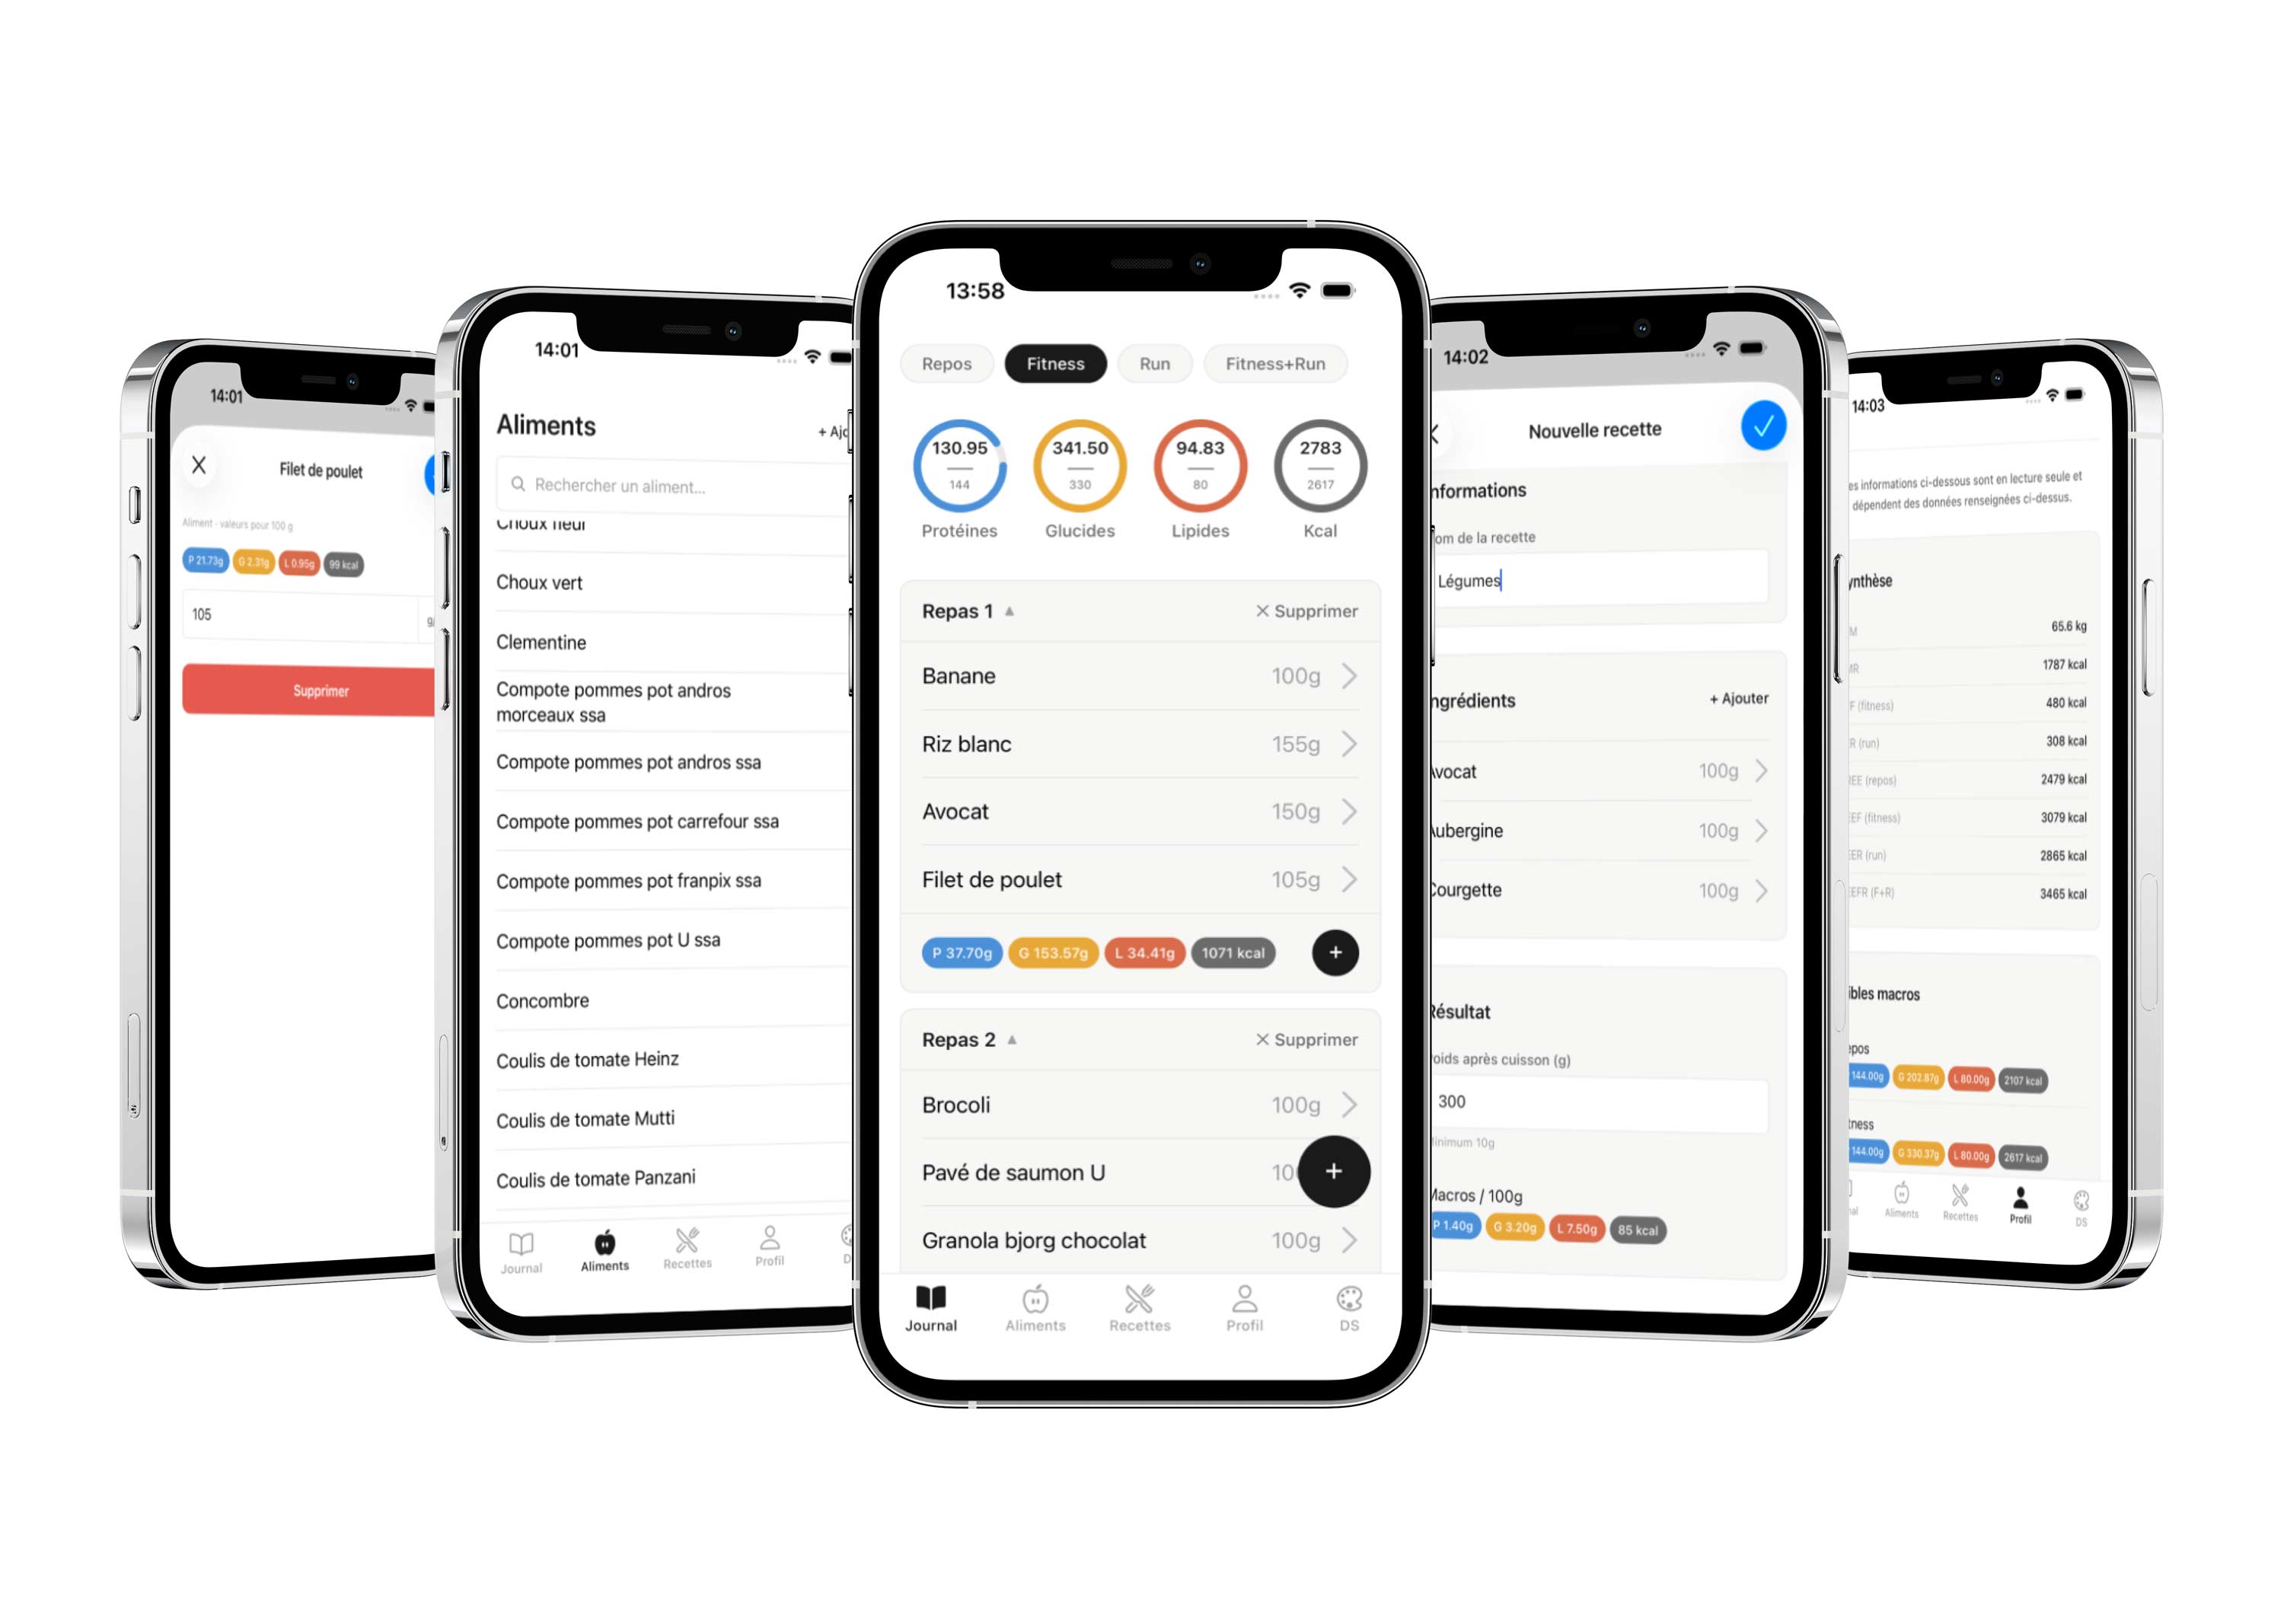
The idea was to turn this Google Sheets into a real mobile app, keeping the same features and the same logic, but with a smooth experience, designed for the phone, installed on my iPhone and used daily.
Why now
The goal wasn't to learn React Native and AI tools in isolation, through tutorials or low-stakes tests. It was to level up on both fronts at the same time, on a real project, with real constraints, and a result that's useful to me daily. Claude Code made this approach credible.
Thinking.
Spec first: how I structured my thinking with AI before touching any code
Doing my homework before starting
Before writing a single line of code, I took the time to understand the ecosystem I was about to work in. Not React Native, not yet: the AI tools themselves. Projects, skills, agents, MCP, context... So many concepts I picked up through tutorials, webinars, official documentation and the LLMs themselves. I wanted to understand how to get the most out of Claude Code and give it the right resources to work efficiently.
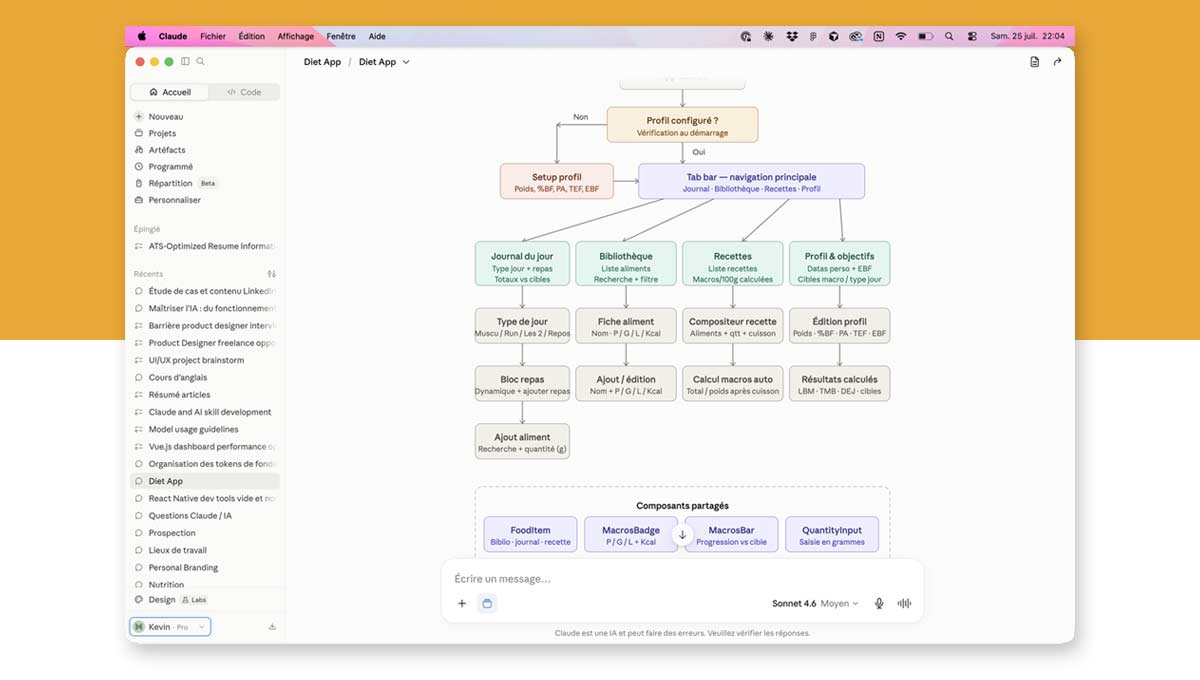
It was while learning about the Figma MCP that I discovered it was possible to pass a FigJam file directly to Claude Code. And that a FigJam board could therefore serve as a visual brief: screen flowchart, navigation, key behaviors. This discovery shaped my organization from the start: a visual document alongside a text document, both serving as references for Claude Code to understand the app's vision before touching any code.
Brainstorming with Claude AI
Armed with this vision, I opened a conversation with Claude AI to structure the project. I had a clear idea: turn my nutrition-tracking Google Sheets into a mobile app. But turning a vision into a brief Claude Code could work from required actual effort.
I shared my CSV files from the Google Sheets, described the expected features, the UX behaviors, the technical constraints. Claude AI helped me refine the vision, arbitrate priorities and define the exact scope of the MVP. This work produced two deliverables: a FigJam flowchart with the main screens, the navigation flows and the key behaviors of each view, and a specs.md file that would become the project's source of truth. Two complementary documents, structured to anchor Claude Code in the app's overall logic before touching any code.
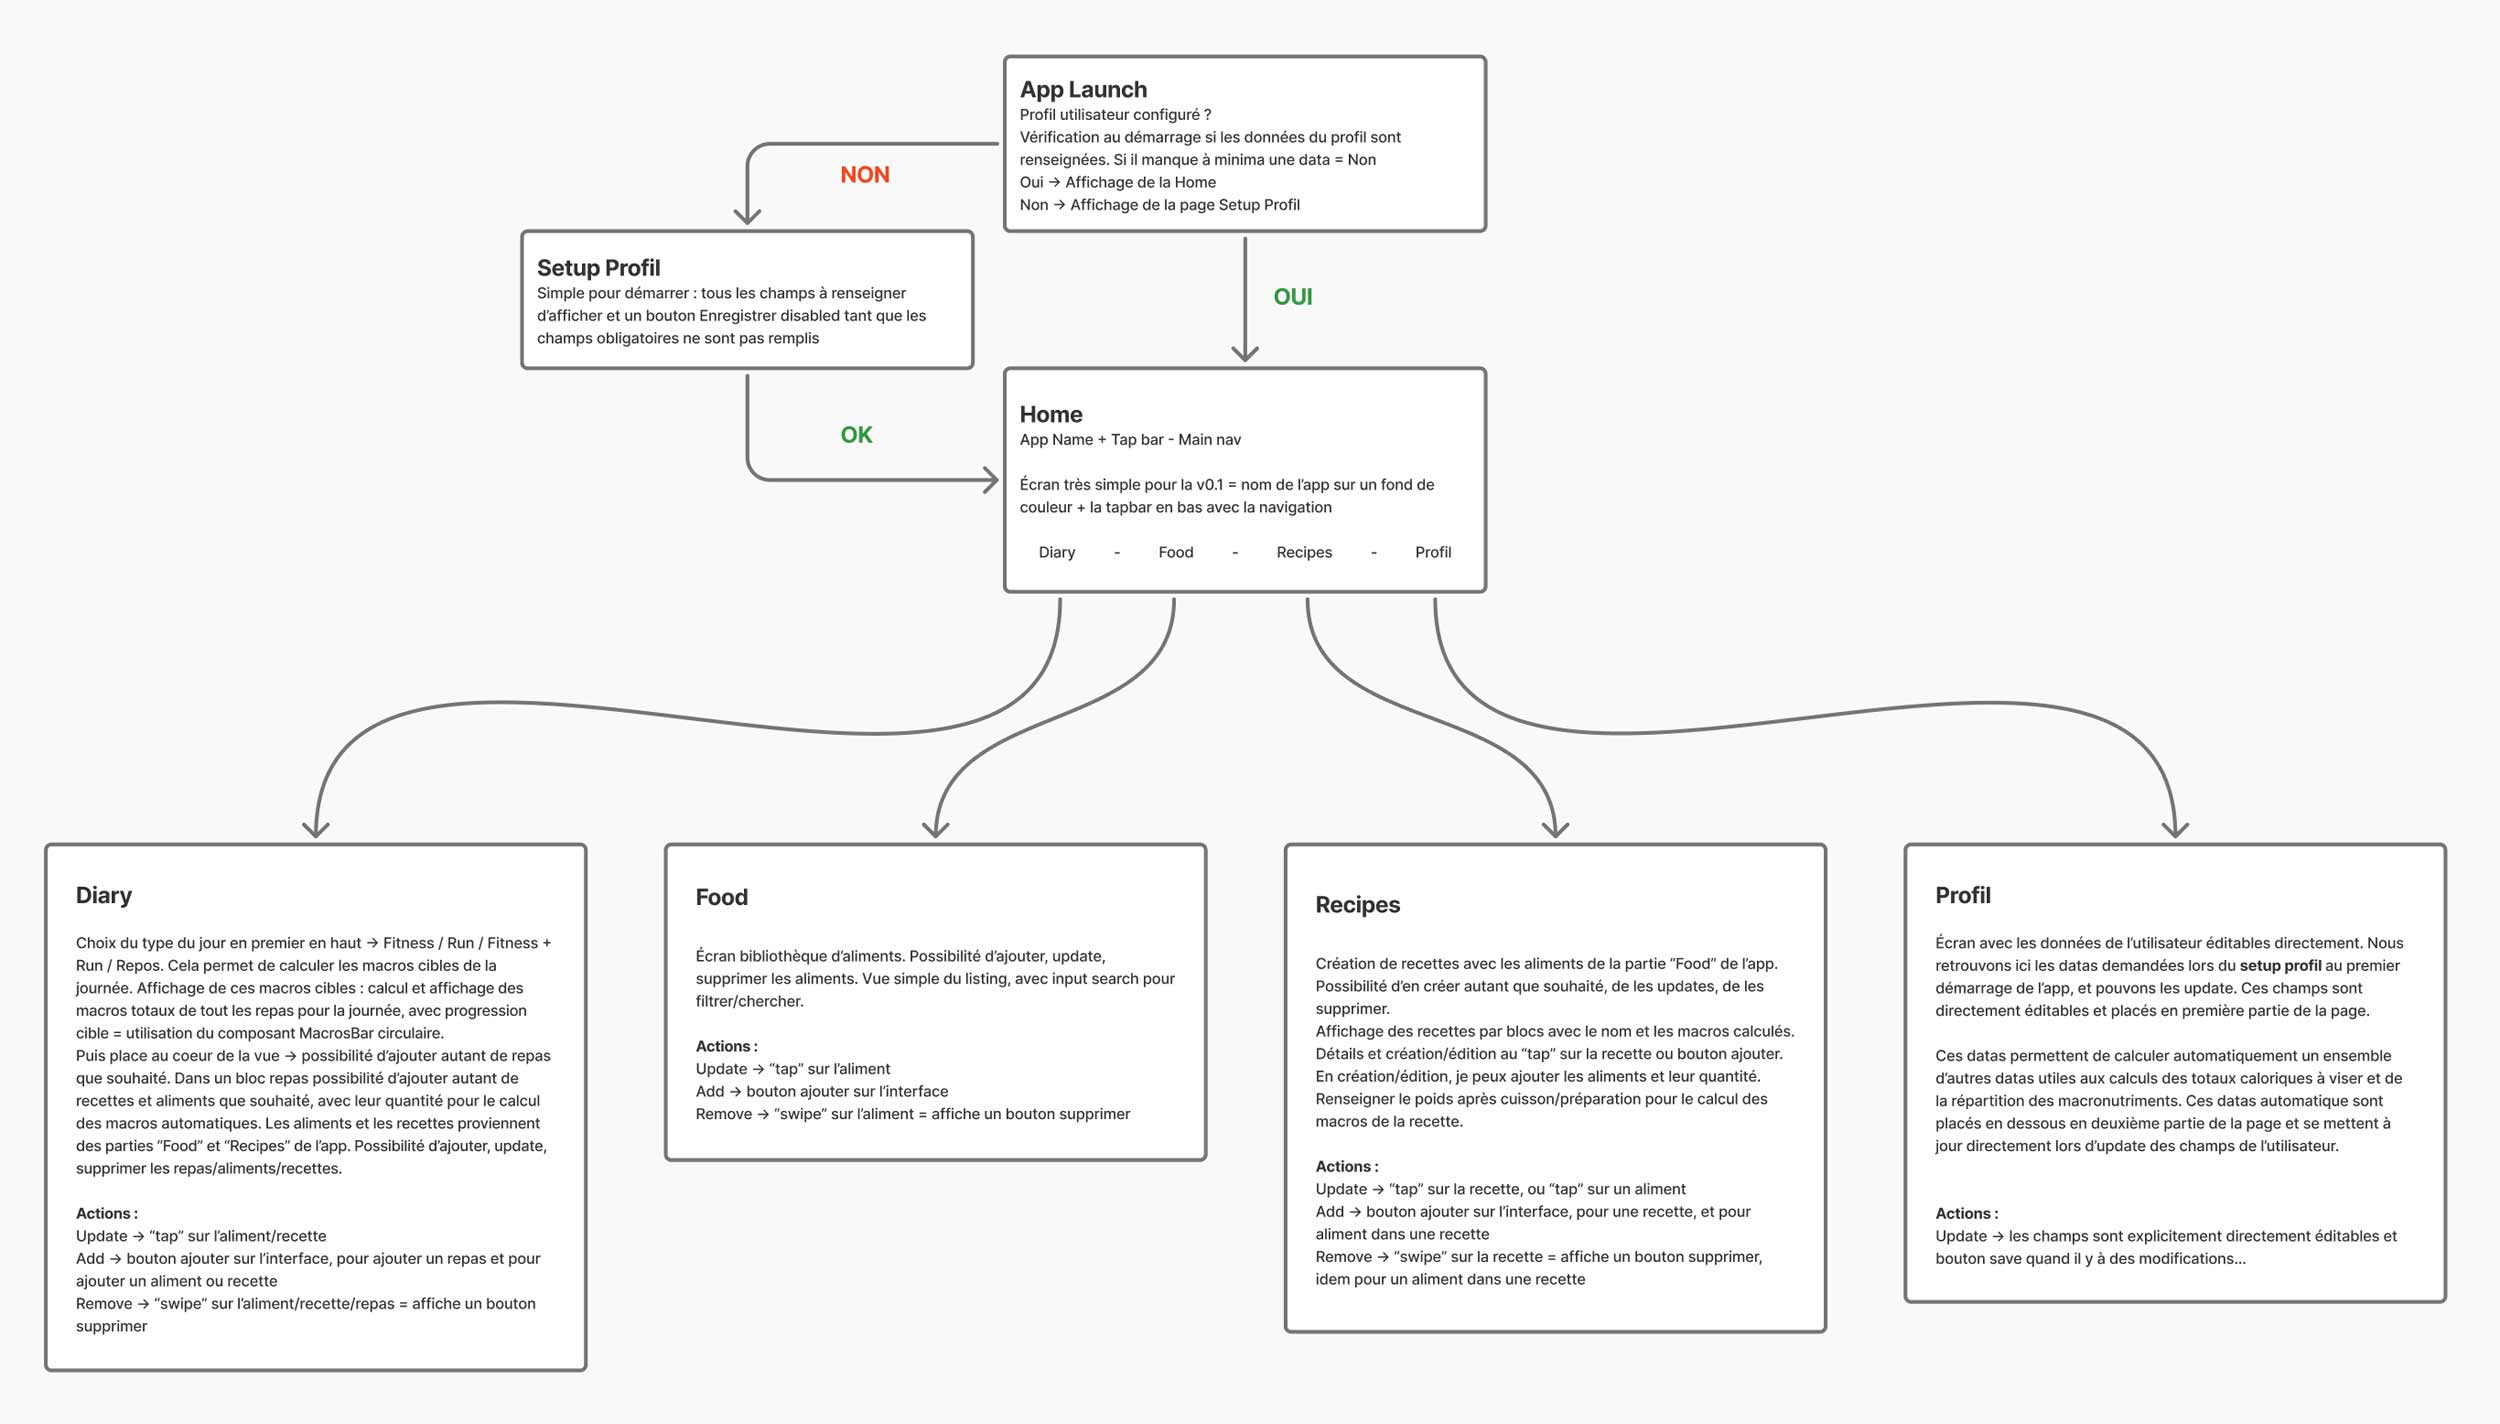
specs.md: a living source of truth
The specs.md isn't a rigid spec sheet. It's a living document: before the build, it concentrates the vision, the technical architecture, the MVP certainties. During and after the build, it grows and gets refined as decisions are made. It was quickly complemented by other thematic files: documentation.md, design-tokens-architecture.md, design-system-rules.md... So many resources Claude Code can consult at any time to stay aligned with the project's intentions.
Briefing Claude Code before coding
Once the FigJam and the specs.md were ready, I built an empty app: file structure, stack installed, a classic "hello world". Then I handed the whole set of resources to Claude Code, without asking it to code anything at all. Its mission: ingest the FigJam, the specs.md and the CSVs, detect inconsistencies, gray areas, friction points. I asked it to produce a summary file of this audit, then we refined the documents before starting on the first batch.
This upfront phase, from the initial brainstorming to the Claude Code brief, took one to two days. Short, but decisive.
Process.
Steering AI with method: batches, discipline and tooling
12 batches, a controlled progression
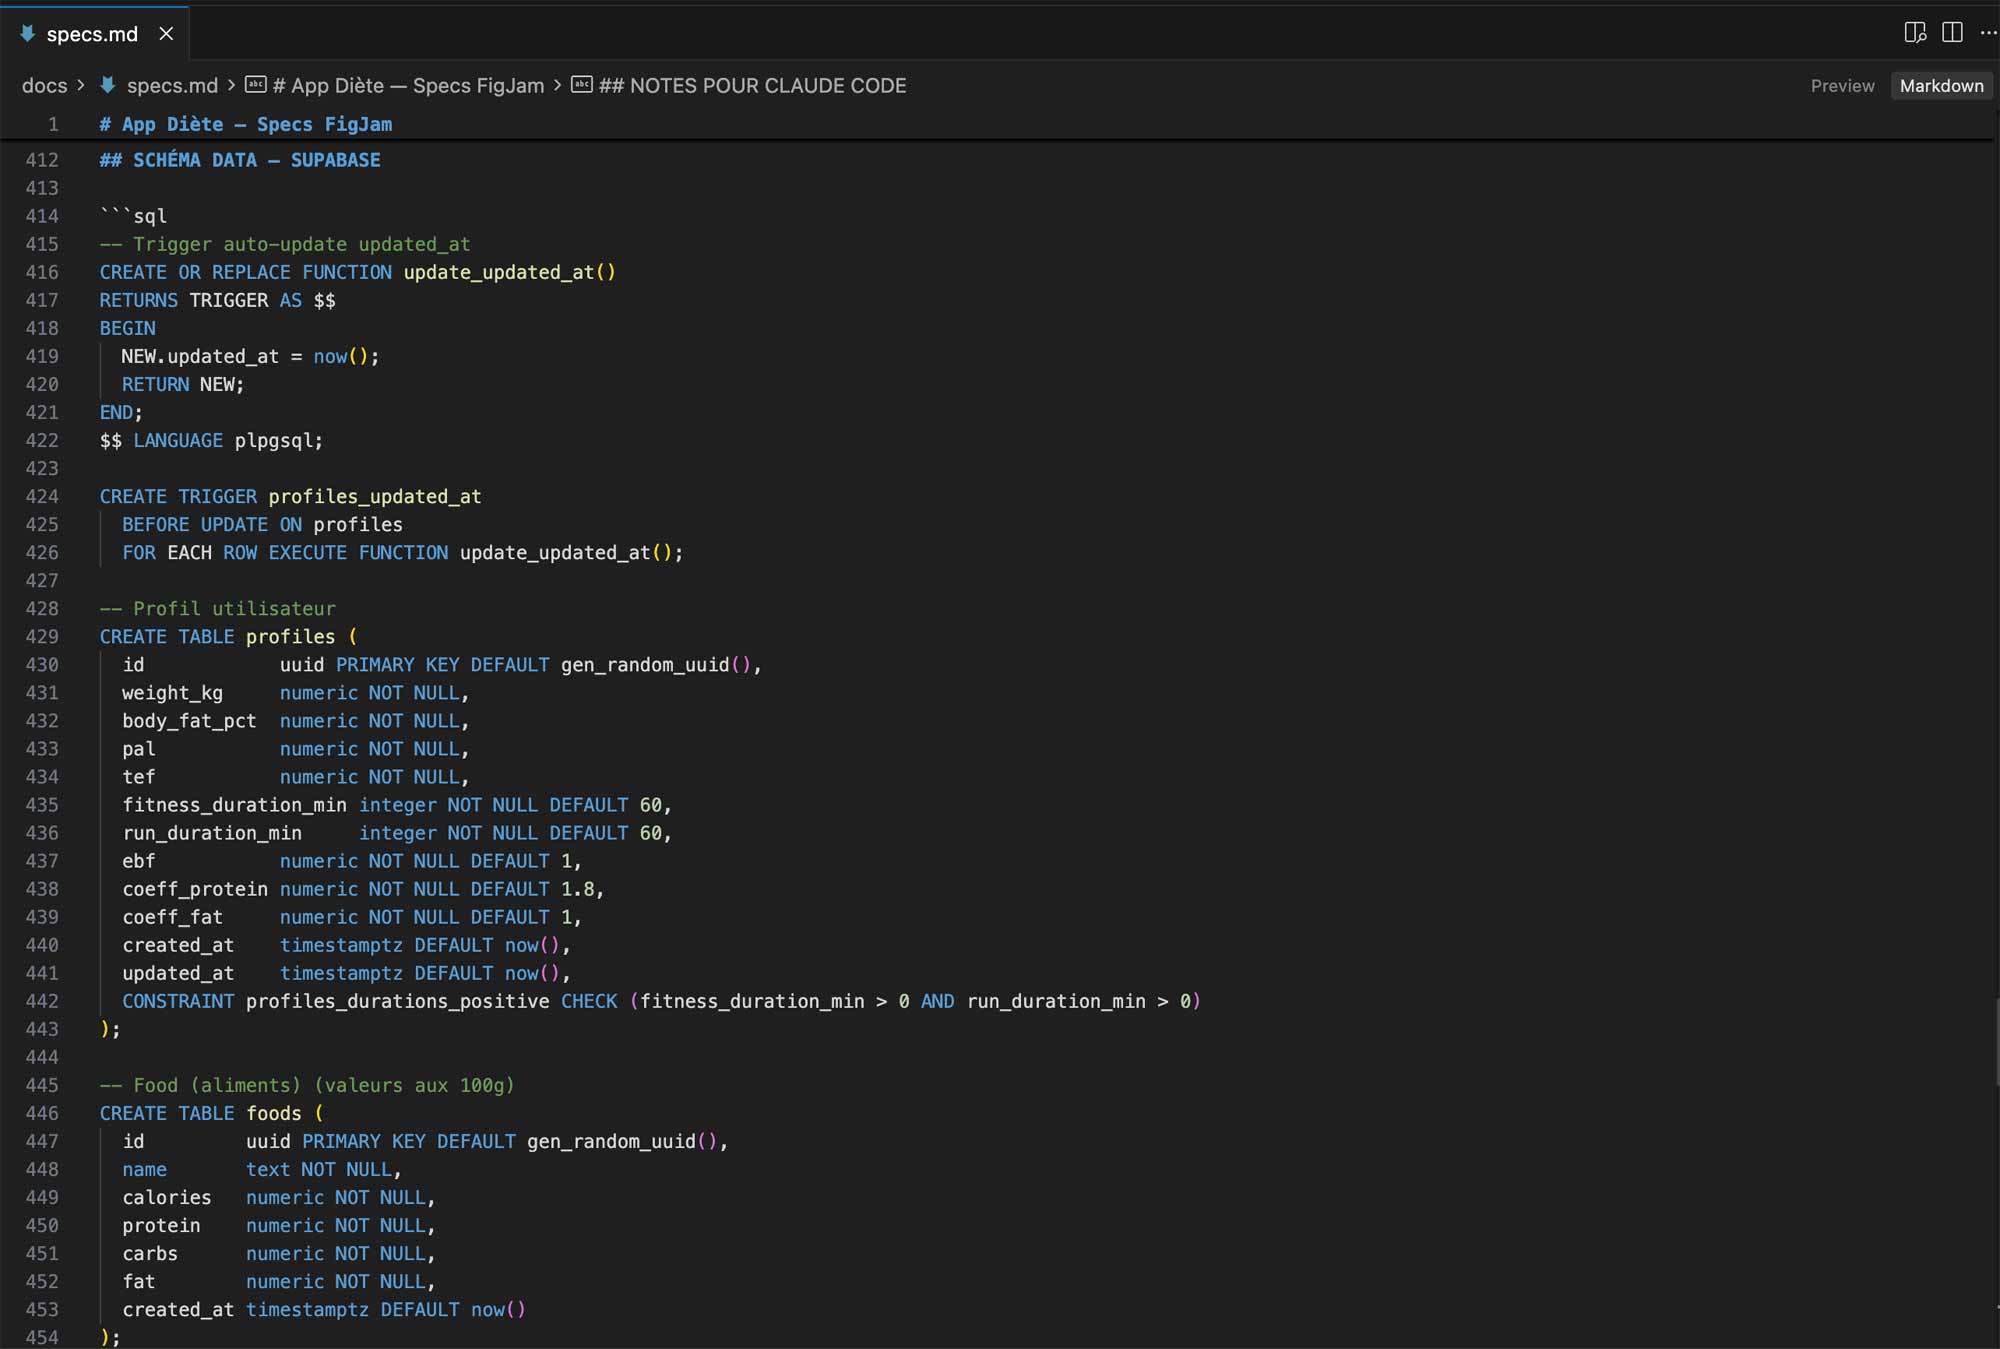
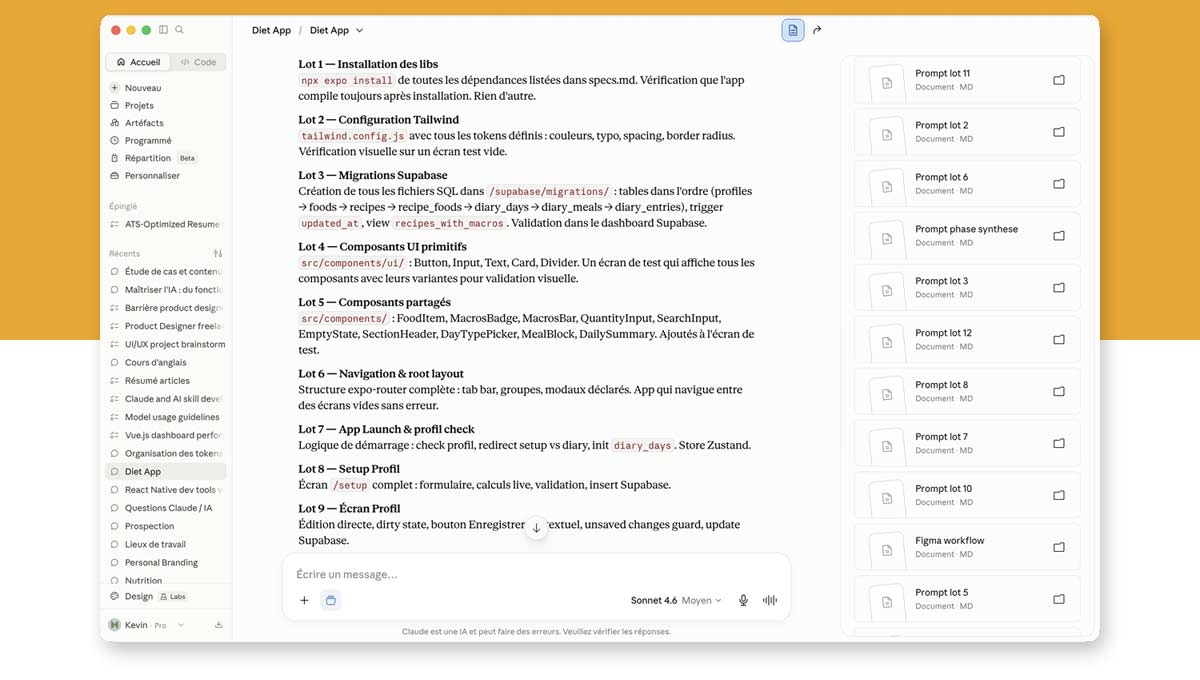
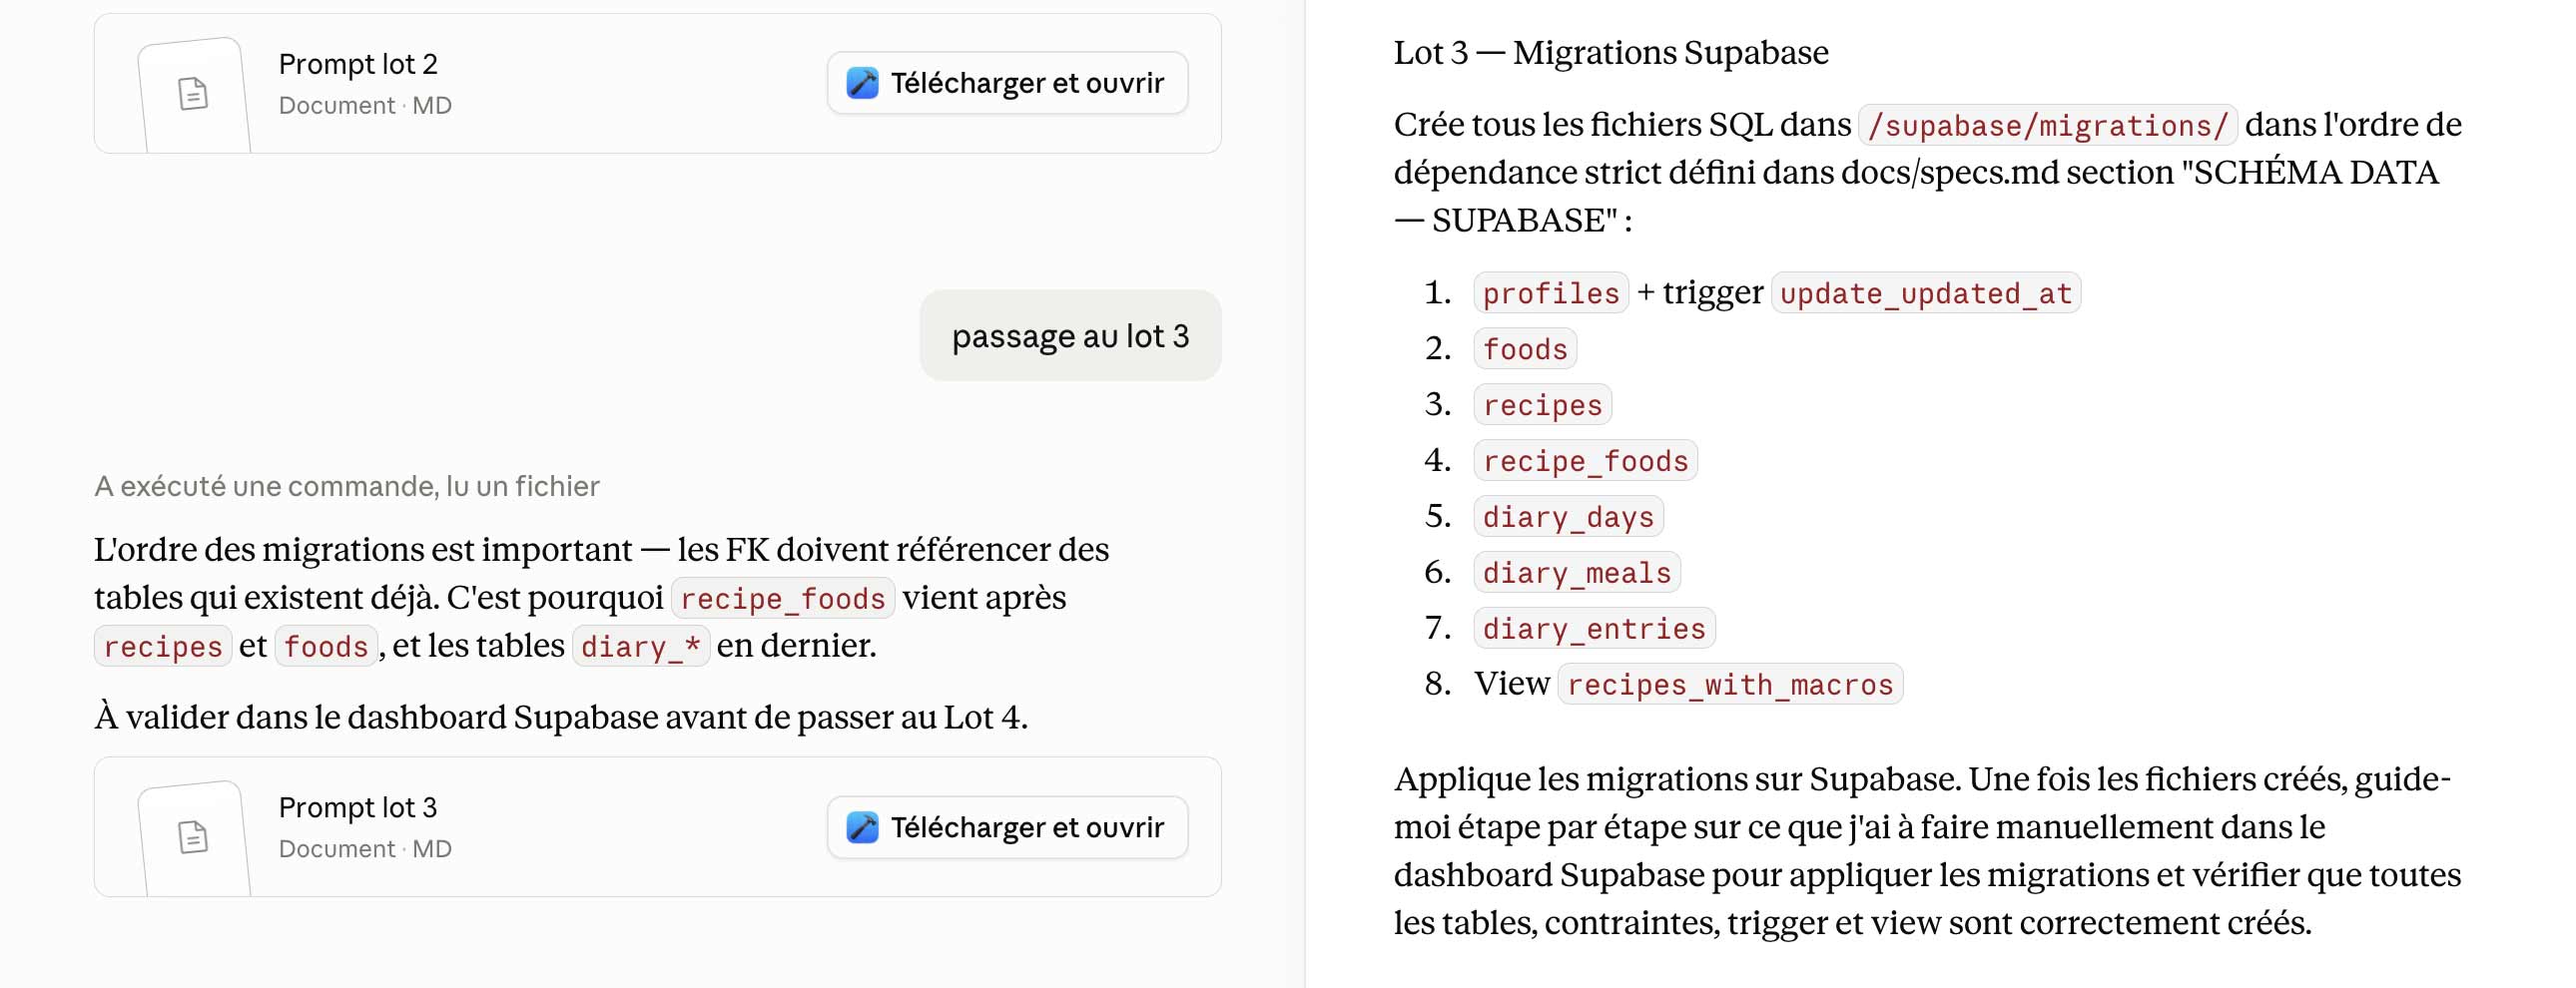
Once the brief was validated, the MVP was broken down into 12 sequenced batches, each with its prompt prepared in advance with Claude AI. One prompt per batch, validation before moving to the next, fixes within the same batch if something broke or an adjustment was needed.
The progression followed a strict dependency order. First the technical foundations: installing dependencies, configuring Tailwind and tokens, Supabase migrations, then the primitive and shared UI components. Then navigation and the expo-router structure. Then the features in logical order: app startup and profile management, setup, profile screen, food library, recipes, and last the daily diary, the most complex screen.
This breakdown wasn't a formality. It's what kept Claude Code within a clear scope in every session, avoided drift, and allowed each step to be validated before moving to the next.
Steering, not just prompting
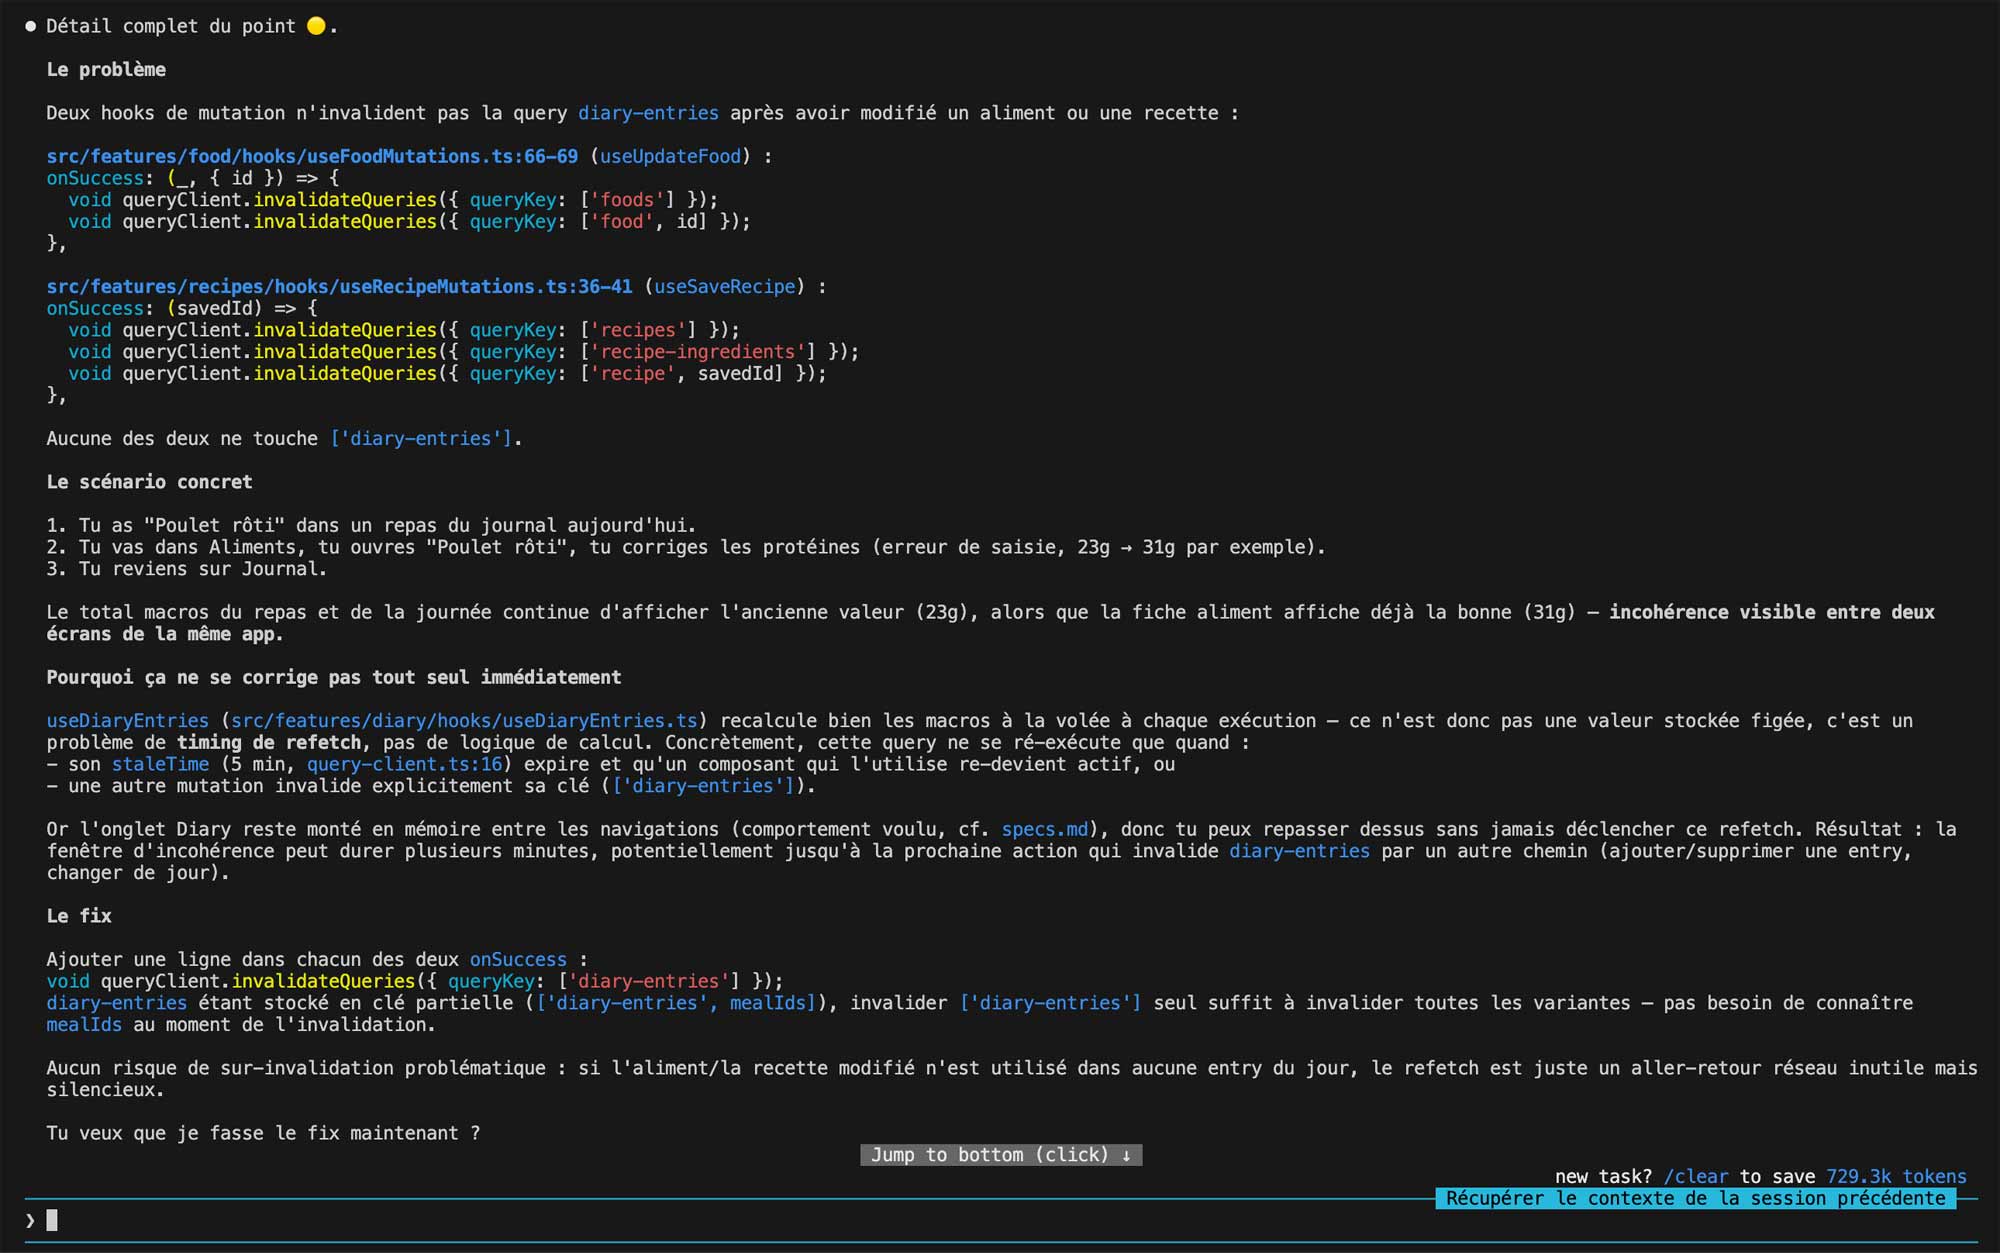
The way of working with Claude Code was refined from the very first batches. The systematic reflex: never ask it to dive straight in. Before every implementation, ask it to lay out its reasoning, look into relevant resources, propose several directions and explain its choices. Validate the direction before greenlighting any changes.
On the design system batch in particular, this approach made a real difference. Refining the vision together, challenging the options, understanding the implications of each decision before writing a line: that's what led to a solid token architecture instead of refactoring afterward.
At the end of a session, the diff reflex: asking Claude Code to summarize what changed, why, and what's left to do. A way of staying in control of what's actually happening in the codebase.
Skills: automating recurring tasks
Between batches, I created two Claude Code skills that became indispensable. The /audit skill triggers a full codebase audit: code quality, component consistency, business logic, alignment with reference docs. The /debug-error skill structures the debugging process with explanations and error-screenshot analysis. These two skills made the refactoring sessions between batches much more efficient and reproducible.
Documentation as infrastructure
Two files emerged naturally over the course of the build. The documentation.md first, halfway through, when the stack was dense enough to need a centralized memo: full technical stack, conventions, debugging patterns, build procedures. A living memo, updated throughout the project and consulted regularly.
The backlog.md next, once the 12 batches were done and one final /audit run: every improvement identified, deferred decisions, next steps ranked by priority. The way to cleanly close out a version without losing track of what's waiting.
Leveling up on an unfamiliar ecosystem
This project exposed me to several new technologies at once. Adapting to React Native was fast: coming from the web, the Yoga templating and the absence of classic CSS require a small adjustment period, but the logic stays familiar for someone with JavaScript and component culture.
On TanStack Query, Zustand and Supabase, the approach was different. These parts relied more heavily on Claude Code. Not blind delegation: the same reflex as elsewhere, asking it to explain the options, the trade-offs, why one structure over another. I controlled the overall architecture, the reusability decisions, the organization into components and objects. But deep mastery of these libs remains an open front, and it's one of the ongoing learnings this project keeps feeding.
Process.
A mobile design system that lives in both code and Figma
Atomic Design: an organization built to last
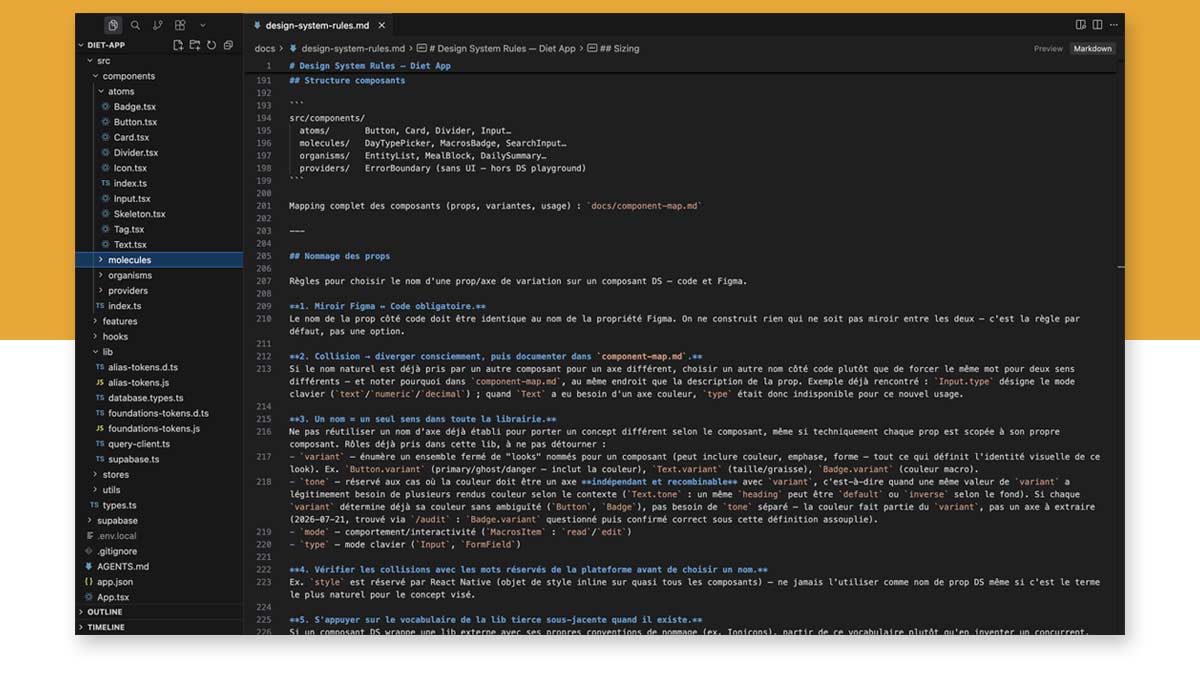
The app's design system is built on Brad Frost's Atomic Design: an organization that breaks the UI into layers of increasing complexity. Atoms are the indivisible building blocks, Button, Input, Text, Card, Divider. Molecules assemble these atoms into composite components: SearchInput, MacrosBadge, FormField. Organisms are self-contained, complex blocks: MealBlock, EntityList, DailySummary. This hierarchy structures both the codebase and the Figma library, both following the exact same organization.
This isn't an aesthetic choice. It's what lets Claude Code know precisely where to create a new component, lets Figma faithfully mirror the codebase, and keeps the whole system coherent as it grows.
NativeWind: Tailwind on mobile
On the web, you'd style with classic CSS. On React Native, there's no CSS: styles are JavaScript objects applied component by component. NativeWind solves this by adapting Tailwind syntax to React Native. You write className like on the web, NativeWind turns it into native styles at build time.
This choice has a direct consequence on the token architecture: the entire design system runs through tailwind.config.js. It's the file that links our tokens to the utility classes available in components.
Token architecture: 3 layers, one-way downward flow
The token system is organized into three distinct layers, each in its own file, with an absolute rule: a token only flows downward, never upward.
Layer 1 is the primitives, in foundations-tokens.js: raw values organized by family. Colors, named by hue and numeric step (gray.900, blue.500). Typography, with font families, sizes and weights. Spacing, fixed dimensions and border radii. These are the system's raw materials, with no intent or assigned role.
Layer 2 is the semantic aliases, in alias-tokens.js: the primitives get assigned a role. gray.900 becomes primary, foreground, surface.foreground. This layer is what produces the Tailwind classes used in code: bg-primary, text-foreground, bg-surface. It also covers typography with styles named by intent, heading, body, label, muted, never by their raw value.
Layer 3 is the component tokens, declared inline at the top of each .tsx file. Each component declares a Tokens object that references layer-2 aliases as a priority. Never a hardcoded hex value, never an arbitrary Tailwind class. Some categories like SPACING, FONT_SIZE or SIZING have no layer 2: a component can then import them directly from foundations-tokens.js. This isn't an exception to the rule, there's simply nothing in between for those.
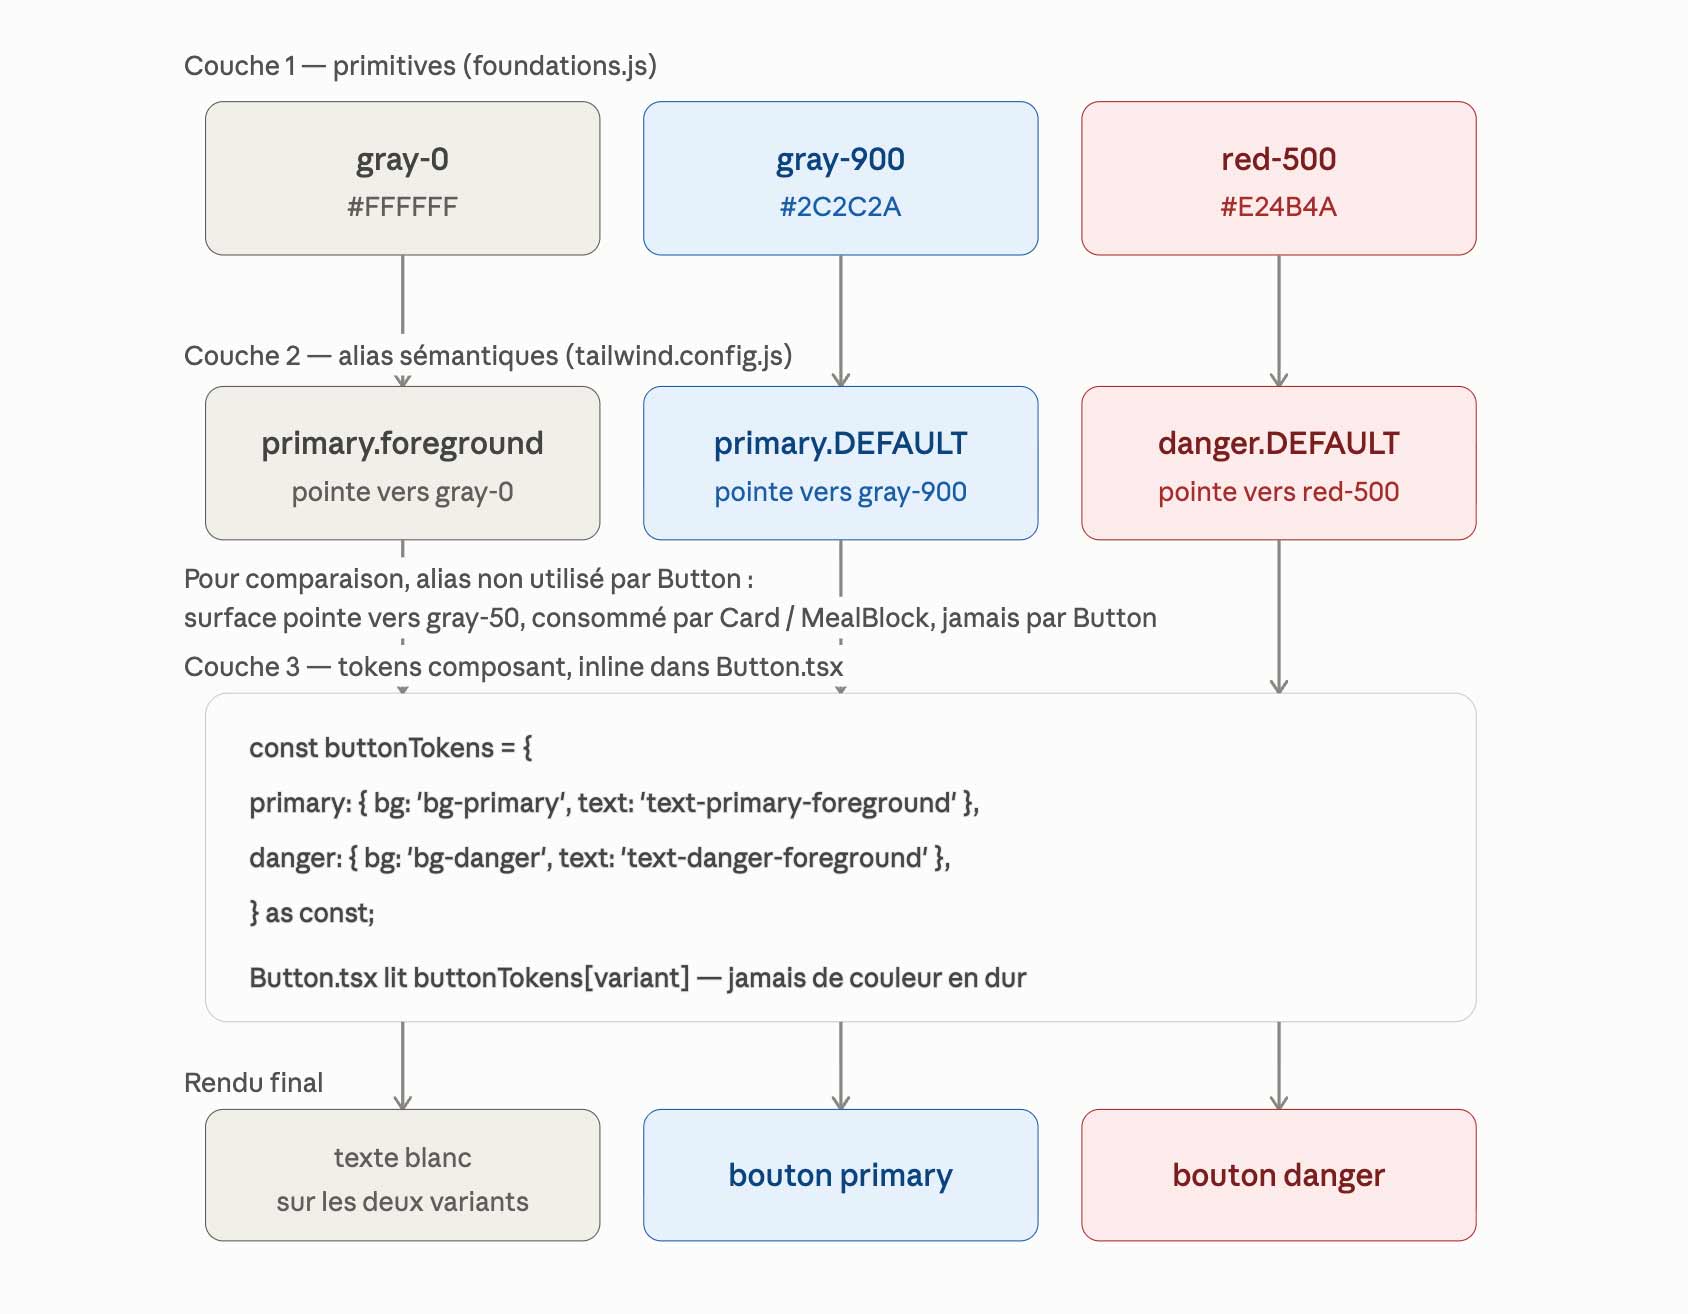
The flow rule is strictly downward: layer 2 never references layer 3, layer 1 never references layer 2 or 3. What's forbidden is flowing back up, not skipping a layer.
tailwind.config.js only assembles: it imports the two token files and wires up the Tailwind theme. It defines no data of its own.
The DS Playground: a native Storybook
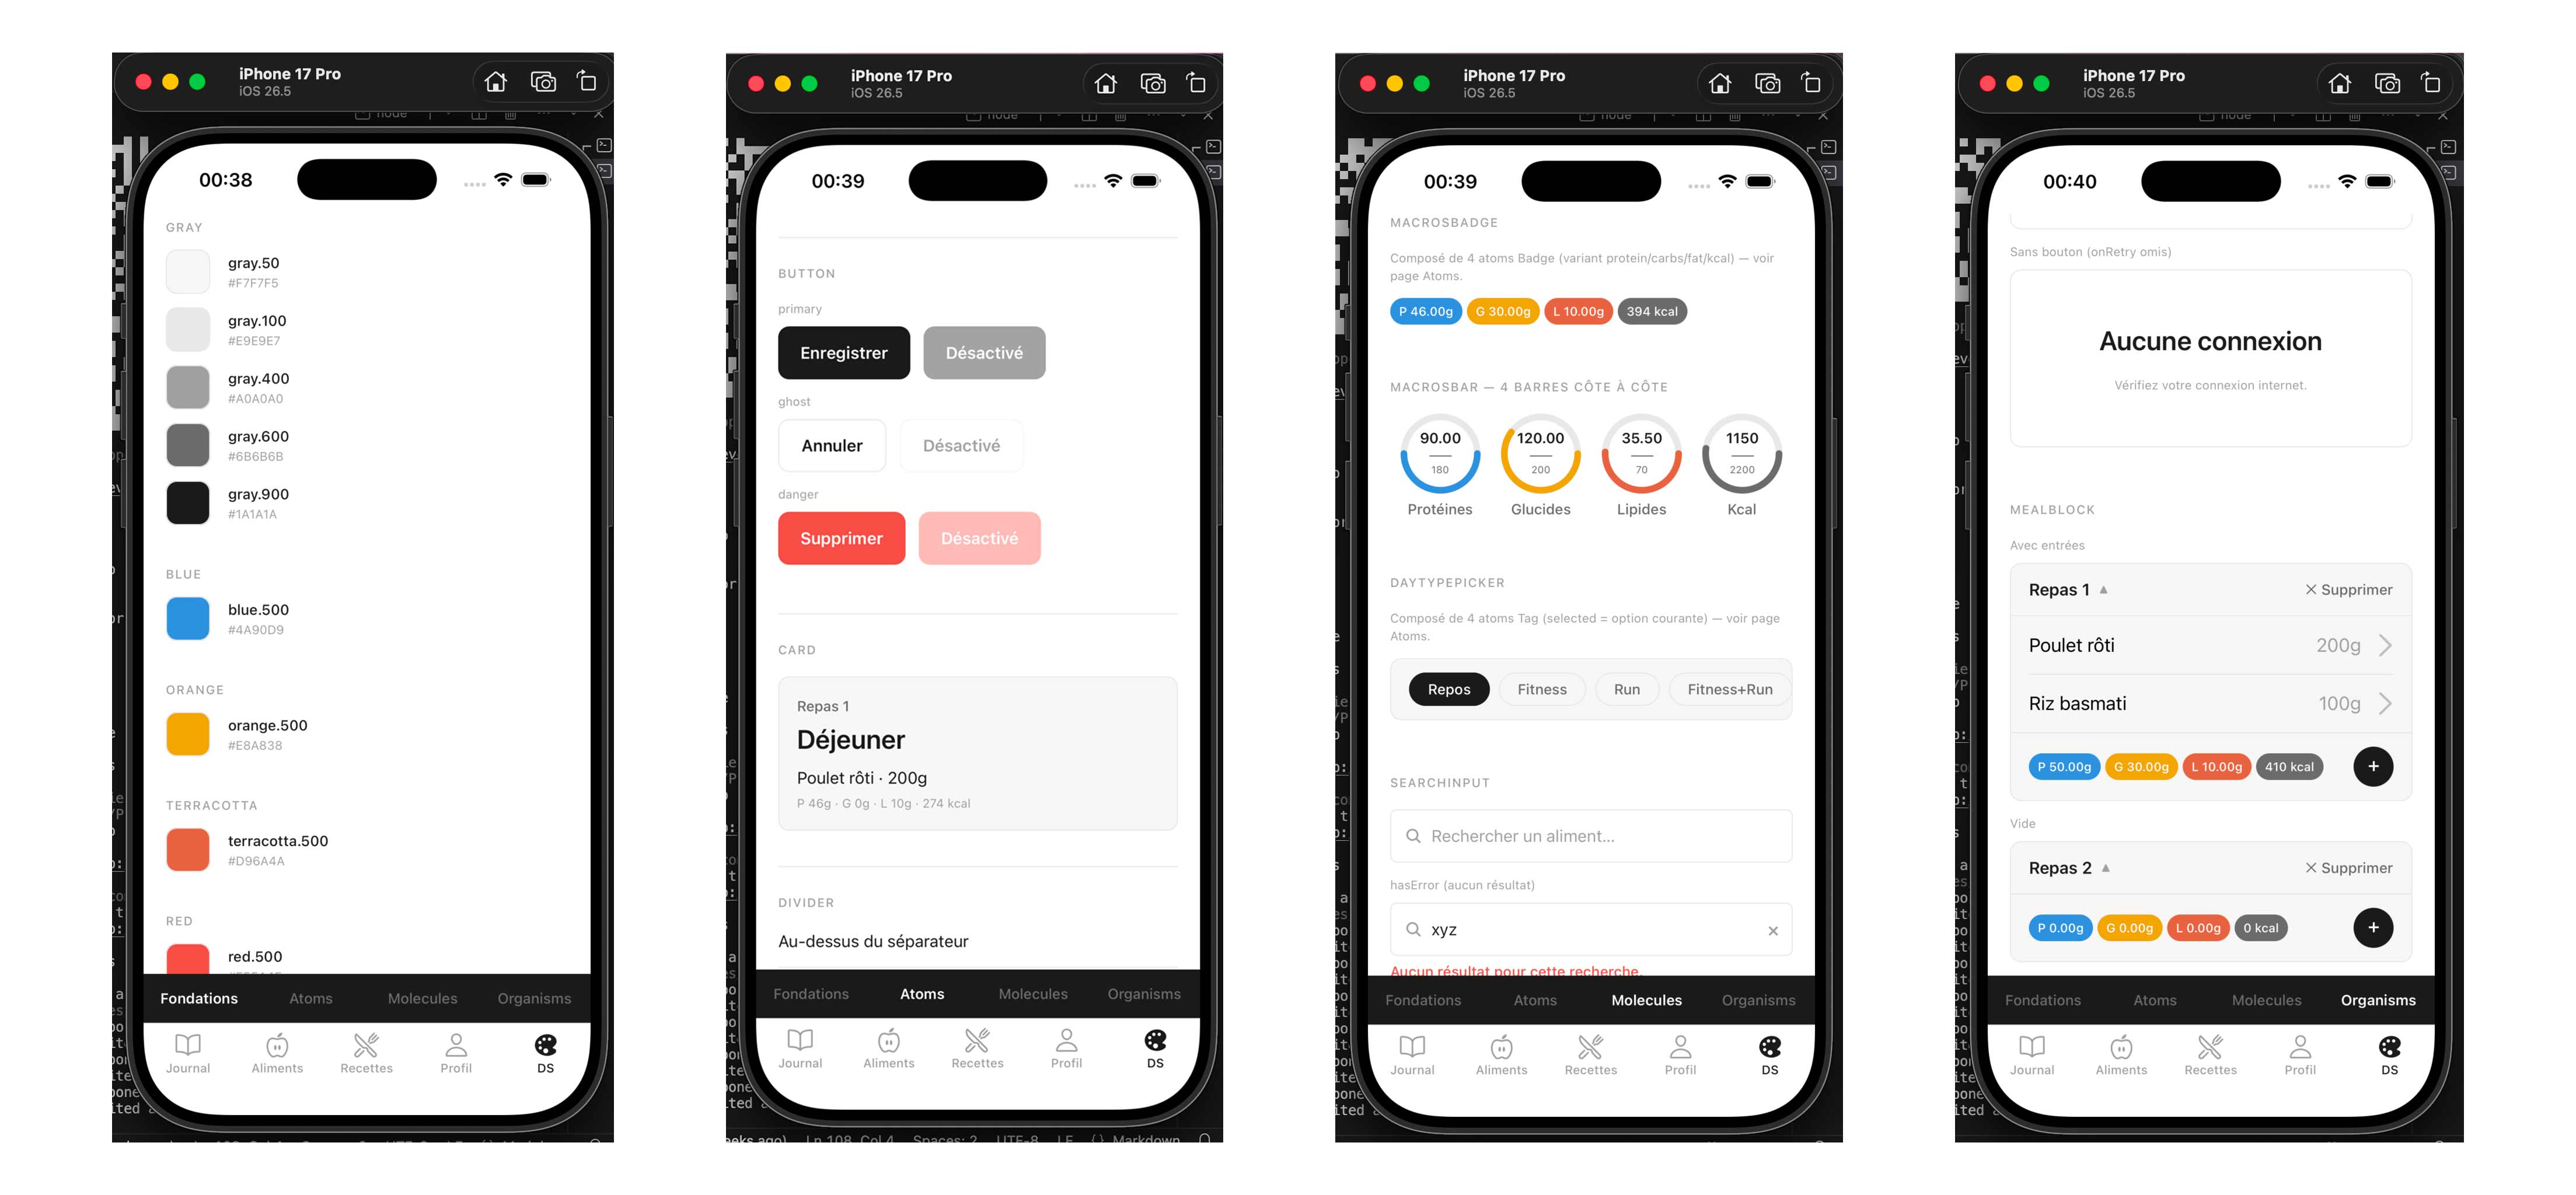
A deliberate tooling choice: a (ds)/ route group, visible only in __DEV__ mode, that lists and documents every component in the system. Foundations, atoms, molecules, organisms: each component is displayed with all its variants, props and states. An in-house Storybook built directly into the app, browsable on simulator or device at any time.
This playground allows each component to be visually validated the moment it's created, and provides a living reference at hand throughout the build.
Process.
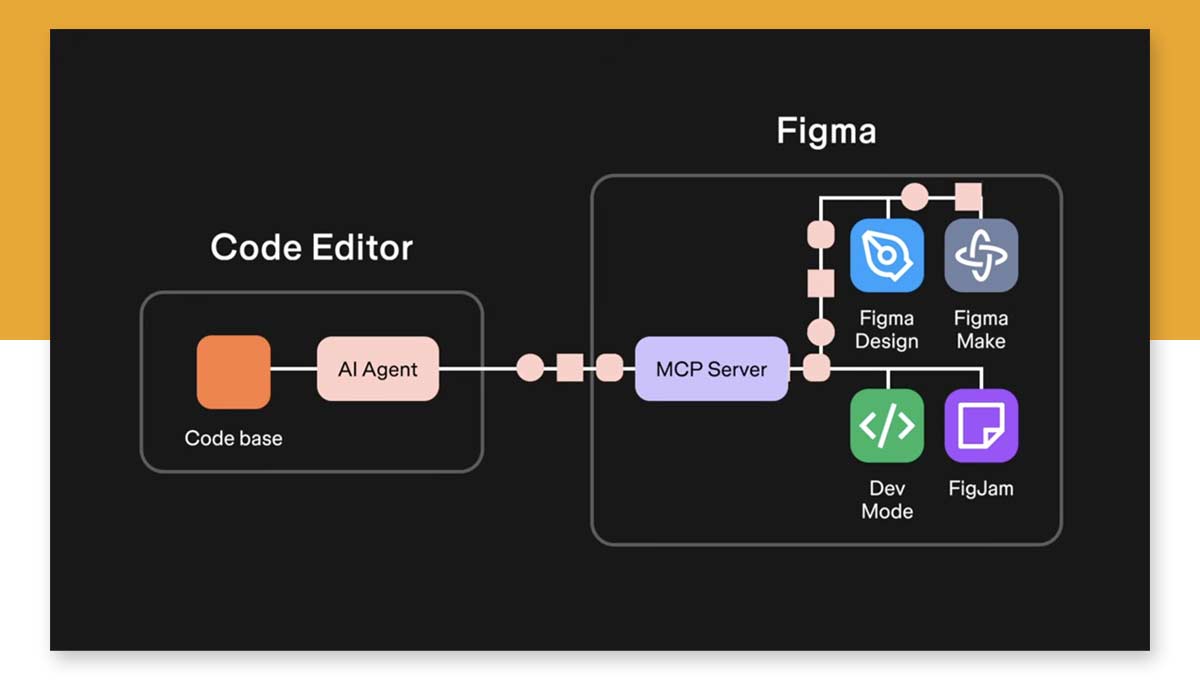
Figma MCP: generating a component library and screens from the codebase
Code Connect: the starting constraint
Figma offers Code Connect, a tool that links Figma components directly to source code. When a developer inspects a component in Figma, they see the real code behind it, not a generated snippet. It's the promise of a native bridge between design and code.
Problem: Code Connect is only available from the Figma Organization plan, well above the Pro plan. Not a viable option for a solo project. A substitute had to be built.
The homemade substitute: three reference files
The answer to this constraint was to manually document what Code Connect would have automated. Three files were created for this.
design-system-rules.md: the condensed styling reference. Technical stack, color and typography tokens, critical rules (twMerge mandatory, no hardcoded values, no StyleSheet.create), visual direction. The document Claude Code consults to know how to style any component.
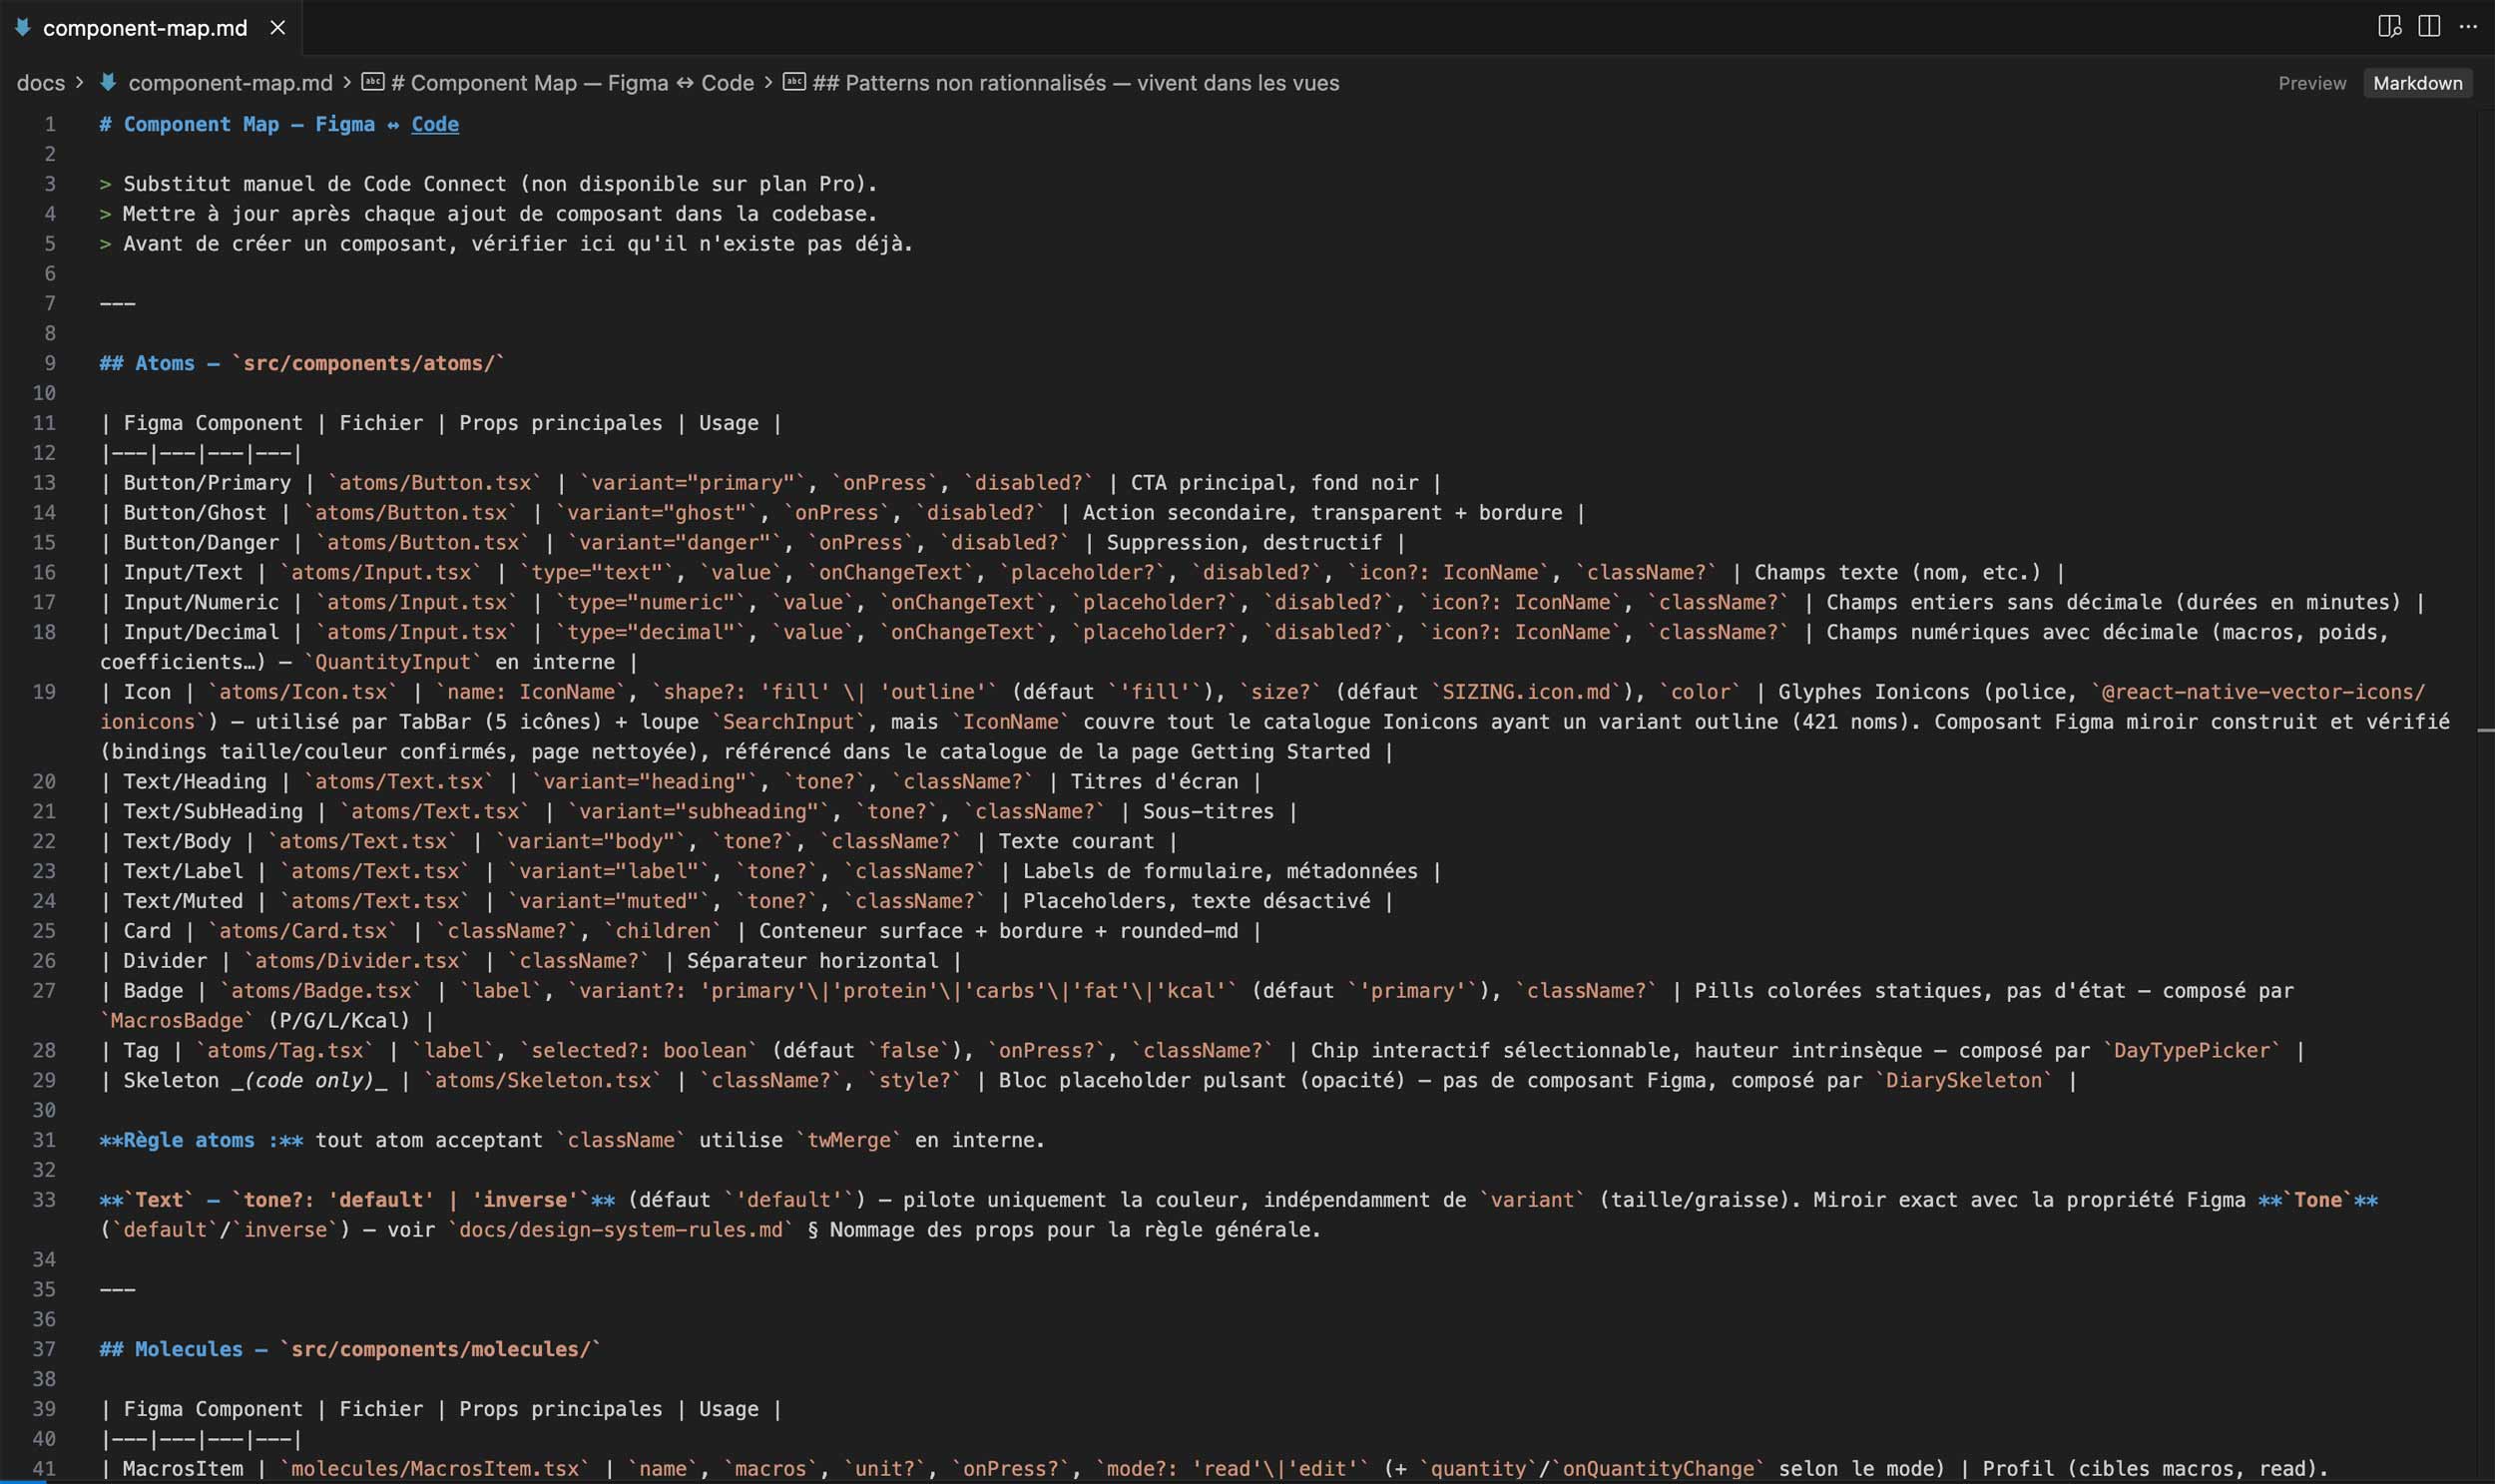
component-map.md: the exhaustive Figma/code mapping. For each component, its name in Figma, its source file in the codebase, its main props, its usages. This is what keeps Claude Code from recreating a component that already exists, and what guarantees both sides stay aligned.
figma-prompt-template.md: the prompt template for every UI update session. A standardized format that ensures no critical information gets lost from one session to the next.
These three files are declared in CLAUDE.md: Claude Code consults them automatically without them needing to be mentioned in every prompt. This substitute doesn't fully cover what Code Connect would do: nothing is automatically and precisely linked between Figma components and React Native components. But it drives Claude Code precisely enough to get close, and to maintain consistency between both sides.
Generating the library from the codebase
Generating the Figma library from the code happens through the /figma-generate-library skill. It's a multi-step task that requires resources: variables, styles, components, pages organized as a mirror of the codebase. The better the codebase is architected and documented, the more precise the generation and the smaller the gaps. But it remains a big task, requiring a dedicated, uninterrupted session.
The result: a Figma library organized like the codebase, with one page per atom, per molecule and per organism. Color variables, typography styles, components with their variants. A solid working base, not a perfect result.
The limits of Code→Figma generation
The Code→Figma direction is the least mature part of the workflow. Inconsistencies are inevitable, and several categories kept recurring on this project.
Variables weren't systematically linked to the generated components. Manual adjustments were randomly needed on colors, typography and spacing, to make sure each component actually used Figma variables rather than hardcoded values.
Text styles weren't linked to the components' text. This is a known gap on Figma's side, a feature that should be added soon.
The code interpretation is sometimes shaky. The MCP generated variants for interactive states that aren't meant to be documented in Figma, adding unnecessary complexity to the library.
The MCP didn't respect component hierarchy: each component was redrawn flat, without instancing the existing child components. In the FormField molecule for instance, which composes the Input atom, the MCP recreated the Input's UI from scratch instead of using its instance. This is probably a case where Code Connect would make the difference: without a precise link between Figma components and React Native components, the MCP has no way of knowing that one component contains another.
Finally, components with distinctive visual patterns were poorly interpreted. The circular progress bar and the circular "+" button were redrawn approximately, far from the real render.
The established best practice: fix things manually in Figma rather than trying to solve everything through iterative prompts. Republish the library after corrections, then move on to the screens.
Generating screens from the specs
Once the library was published and manual corrections applied, the screens could be generated via /figma-generate-design. I generated one screen per prompt, in a logical order from simplest to most complex. Setup first, Profile, Food, Recipes, and last the Diary, the most complex screen with its bottom sheet, its snap points and its behaviors that can't be inferred from the Figma structure alone.
For each screen, Claude Code receives the library file URL, the target frame's URL with its node-id, the source .tsx file, and the corresponding functional specs. It works section by section, using instances of published components, all colors linked to Figma variables, with visual validation after each section.
After each generated screen, discrepancies are fixed manually in Figma by comparing against the iOS simulator. Whatever can't be inferred from the structure — interactive behaviors, navigation guards, bottom sheet transitions — is annotated in the prompts.
Claude Code consulting Figma
A use case that emerged naturally over the course of the project: using the Figma MCP the other way around, not to generate but to consult. Claude Code accesses the Figma library to spot gaps, check the alignment between what exists in Figma and what exists in the code, and identify states or variants that haven't been implemented yet. A permanent cross-audit that keeps both sides in sync.
Figma→Code: the reverse workflow
Once the library and screens were in place in Figma, UX and UI work could happen directly in Figma. And since then, the reverse direction is operational too.
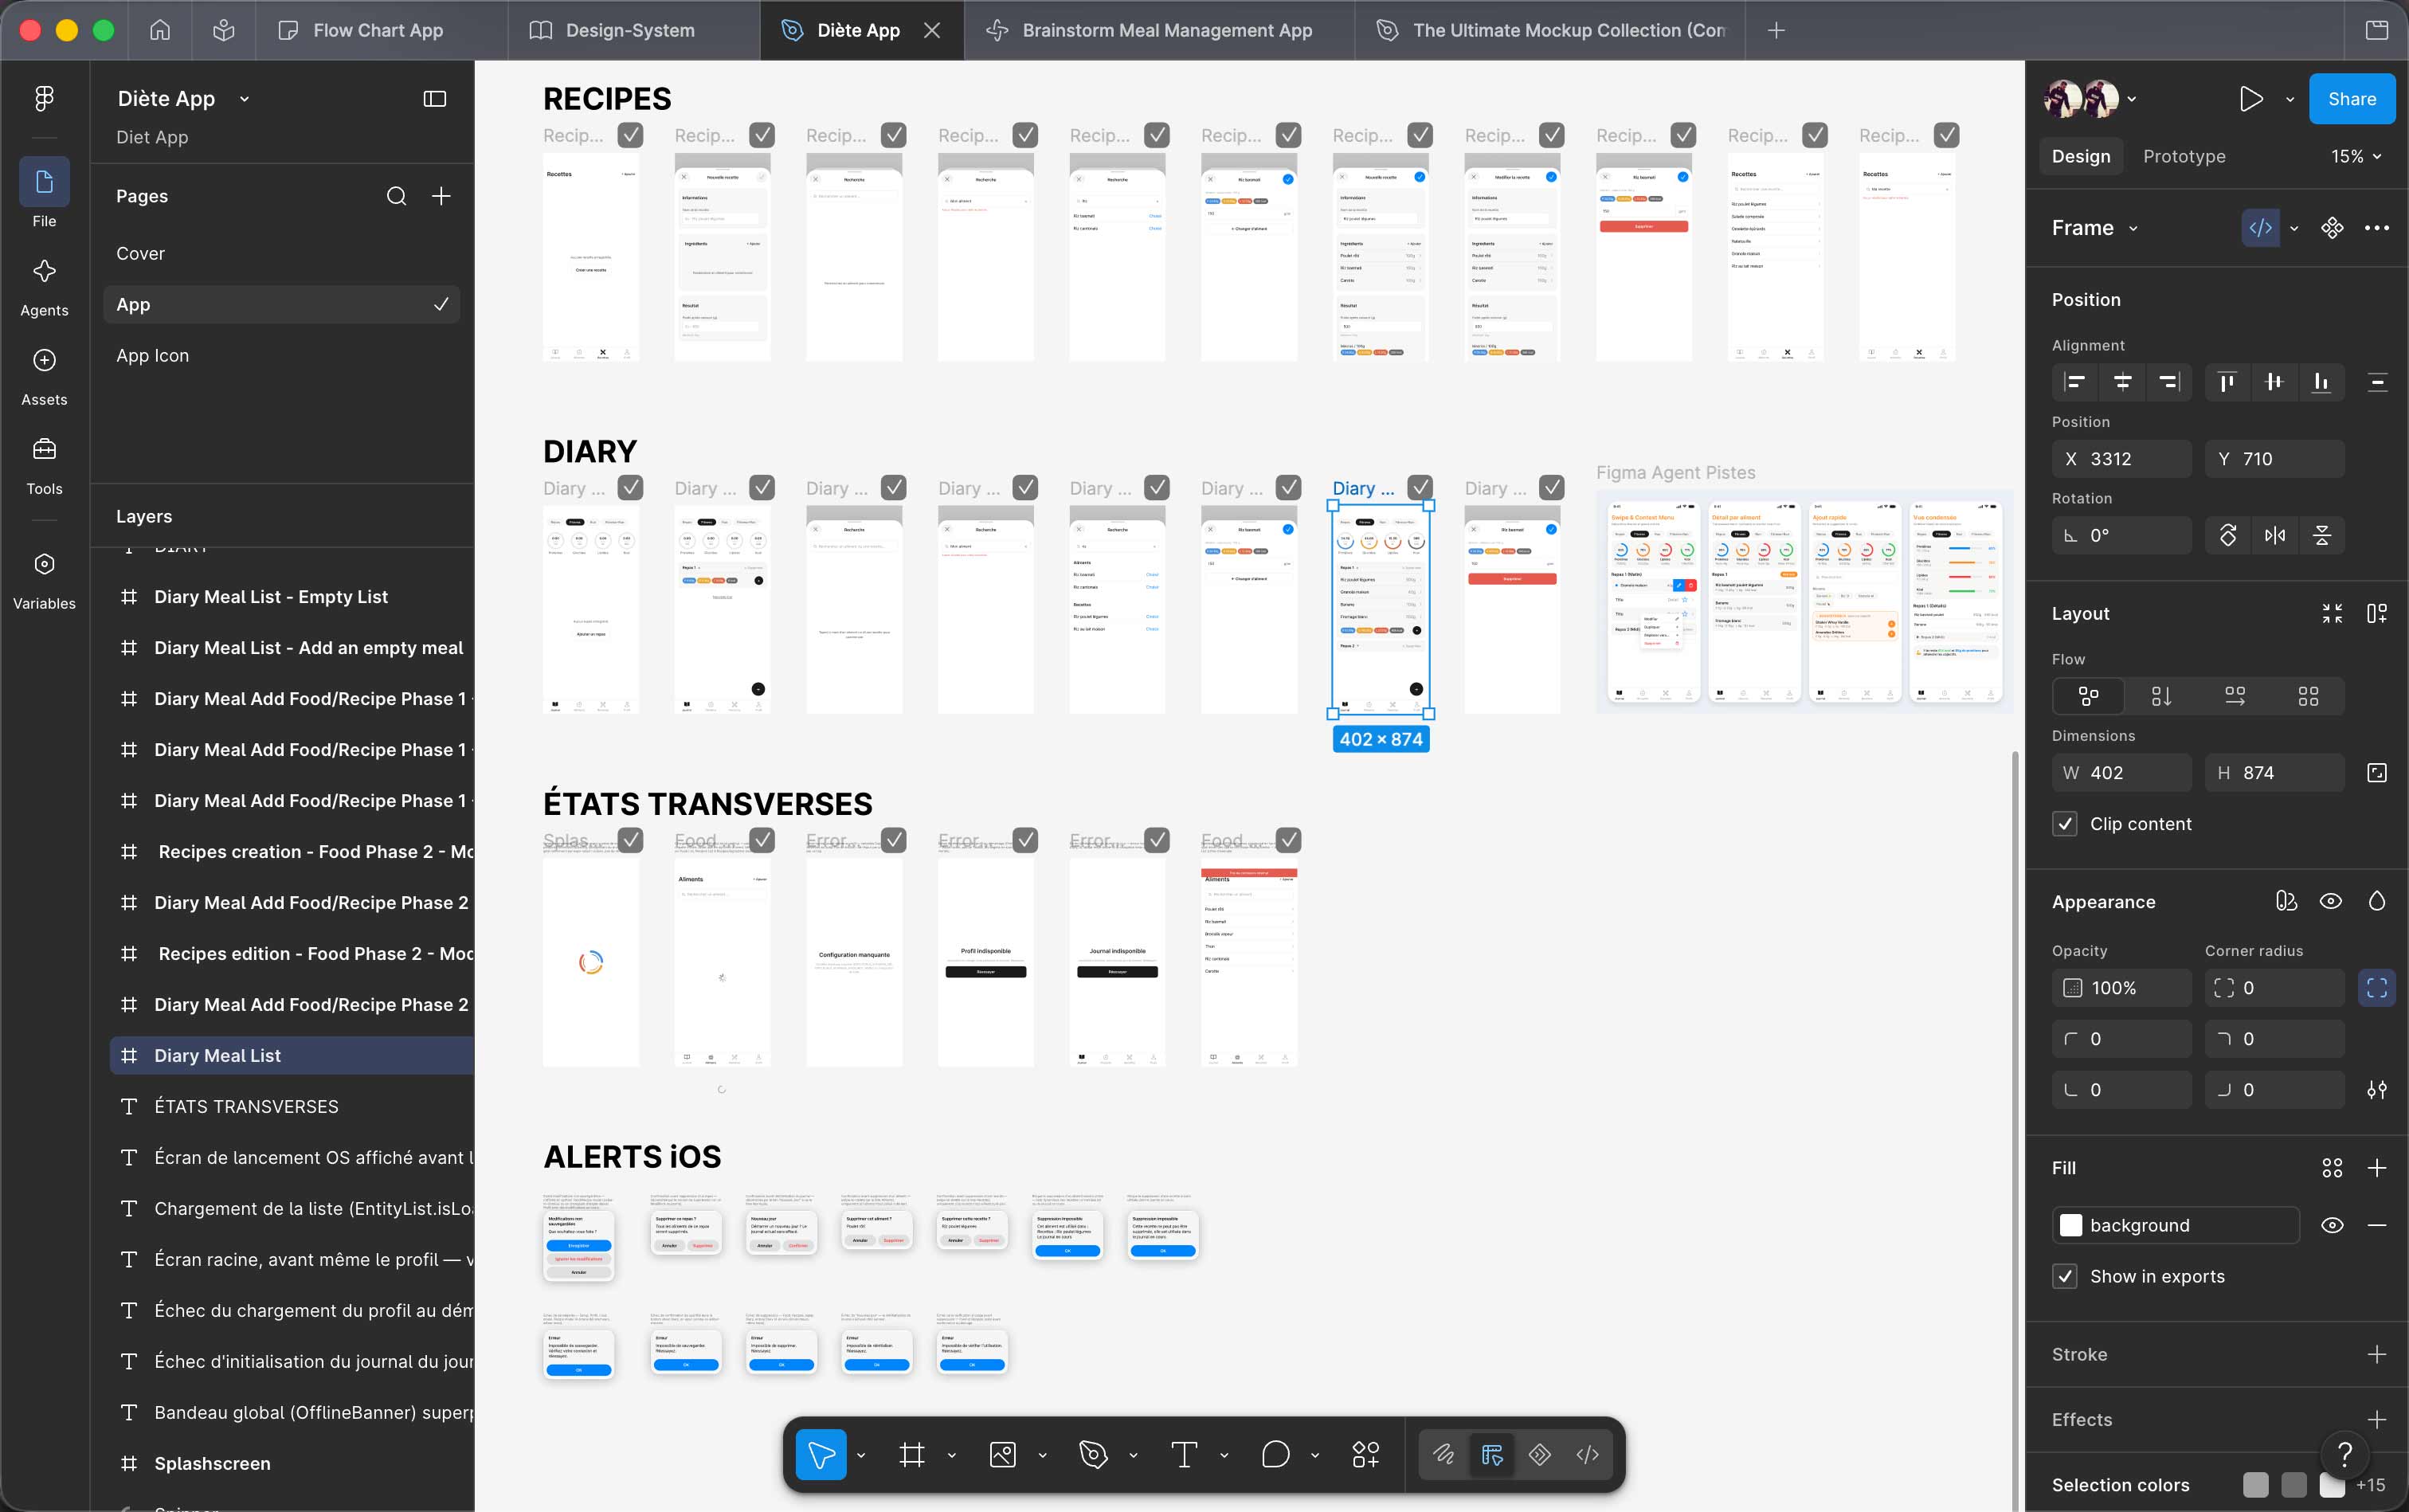
The workflow is as follows: precise frames with annotations in Figma, a targeted layer URL, a prompt built from figma-prompt-template.md, and the full set of reference .md files in context. Claude Code reads the frames, reads the annotations, compares them with the existing code, proposes a plan of action and implements the changes. component-map.md is especially useful here: Claude Code knows exactly which existing component to modify instead of recreating a new one.
Frames + annotations + prompt + reference documents: a defined, reproducible workflow for implementing updates or new features.
Tracking the Figma/Code gaps
To keep a clear view of what exists in Figma and in the code at any given time, I created a figma-etats-manquants.md file. It exhaustively lists components, flows, states and interactions: what's in the Figma library, what's in the app, and the gaps between the two. A cross-audit that serves as a starting point whenever there's a need to iterate on a specific state, in either direction.
Retrospective.
React Native, Claude Code, Figma MCP: what I'm really taking away from this
What I learned
The most significant lesson from this project isn't technical, it's methodological. Knowing how to steer AI tools on a project of this scope, structuring context, sequencing the work, validating before implementing: that's a skill in its own right, one you acquire by doing. This project gave me a way of working with AI that I couldn't have built any other way than under real conditions.
React Native came second. The learning curve was less steep than expected for someone with a solid JavaScript background. The ecosystem is dense, Expo simplifies a lot, and the component logic stays familiar. What really changes is how you think about layout, performance, and the build cycle. Reflexes to build, not fundamentals to relearn.
What this changes in my practice
This project is reshaping how I work. The specs-first approach, breaking work into batches, Claude Code skills: these are methods directly transferable to my client projects. Especially on two fronts where I see an immediate impact: design system work, where the Code/Figma workflow opens up possibilities I didn't have before, and the ability to build or prototype products quickly and make them testable.
What I'd do differently
If I started over, I'd change one thing: start earlier. AI development tools were still in their infancy a year ago, but that was already enough to get going. The real barrier wasn't technical, it was finding the right excuse to commit to it seriously.
What's next
The project continues. In the immediate term, improving the app's UX and UI with the established Figma workflow. In the medium term, opening the project to other users, implementing authentication, evolving the features. And in the longer term, exploring integrating AI solutions directly into the app.

Kevin Bizien
UI & Design System specialist
Want to tell me about your UI project? Contact me at bonjour@kevinbizien.com and we can start talking soon!